6 Easy steps to create a Microsoft survey
Microsoft Forms is a handy tool for gathering feedback in a clear and organized way. In this article, I’ll guide you on how to create a Microsoft survey.

Remember those MS paint days? Microsoft has evolved a lot ever since and has become a household name in the tech industry, and for good reason.
The company has a global PC market share of 4.7%. Their suite of products, including Microsoft Office 365, offers powerful tools for many everyday tasks.
One such tool is Microsoft Forms, a survey and quiz maker that's great for gathering feedback in a clear and organized way.
In this article, I’ll guide you on how to create a survey in Microsoft Forms. I’ll cover everything from writing questions, formatting them, and sending the survey out.
And don’t worry! I'll also be upfront about the limitations you might encounter while creating a Microsoft survey.
Let’s begin, shall we?
How to create a survey in Microsoft forms?
Here are the steps to create a survey in Microsoft Forms.
1. Start a new form
Head over to Microsoft Forms and use your email and password to log in with your Microsoft account. If you don't have an account, you can create one for free.
Once you're signed in, you'll see the Microsoft Forms dashboard. Click on "New form" to get a blank canvas for your survey.
Alternatively, you can select from Microsoft Forms templates for your survey from the “Create from most popular templates” section.

2. Name your survey
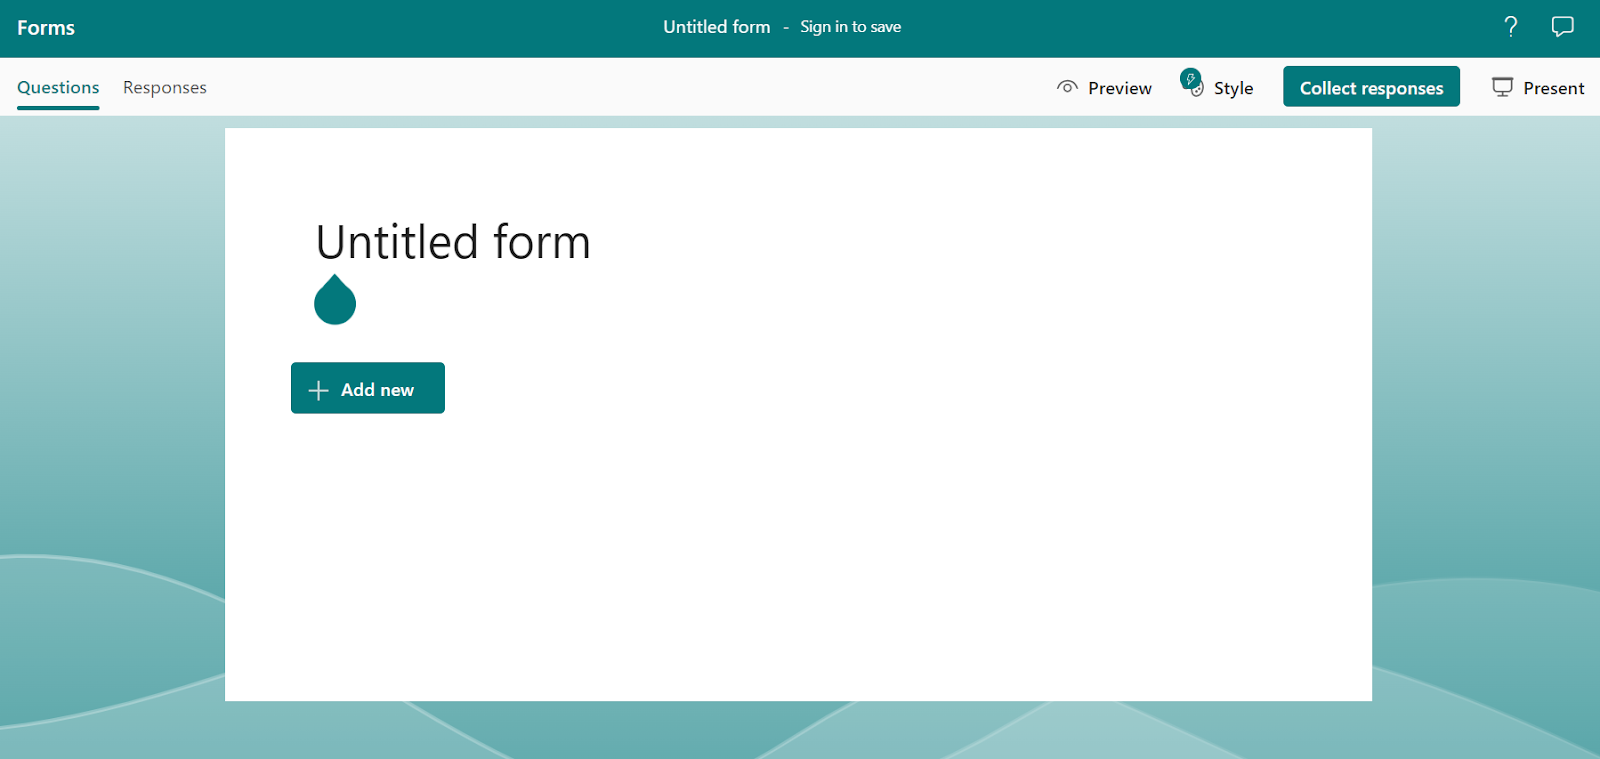
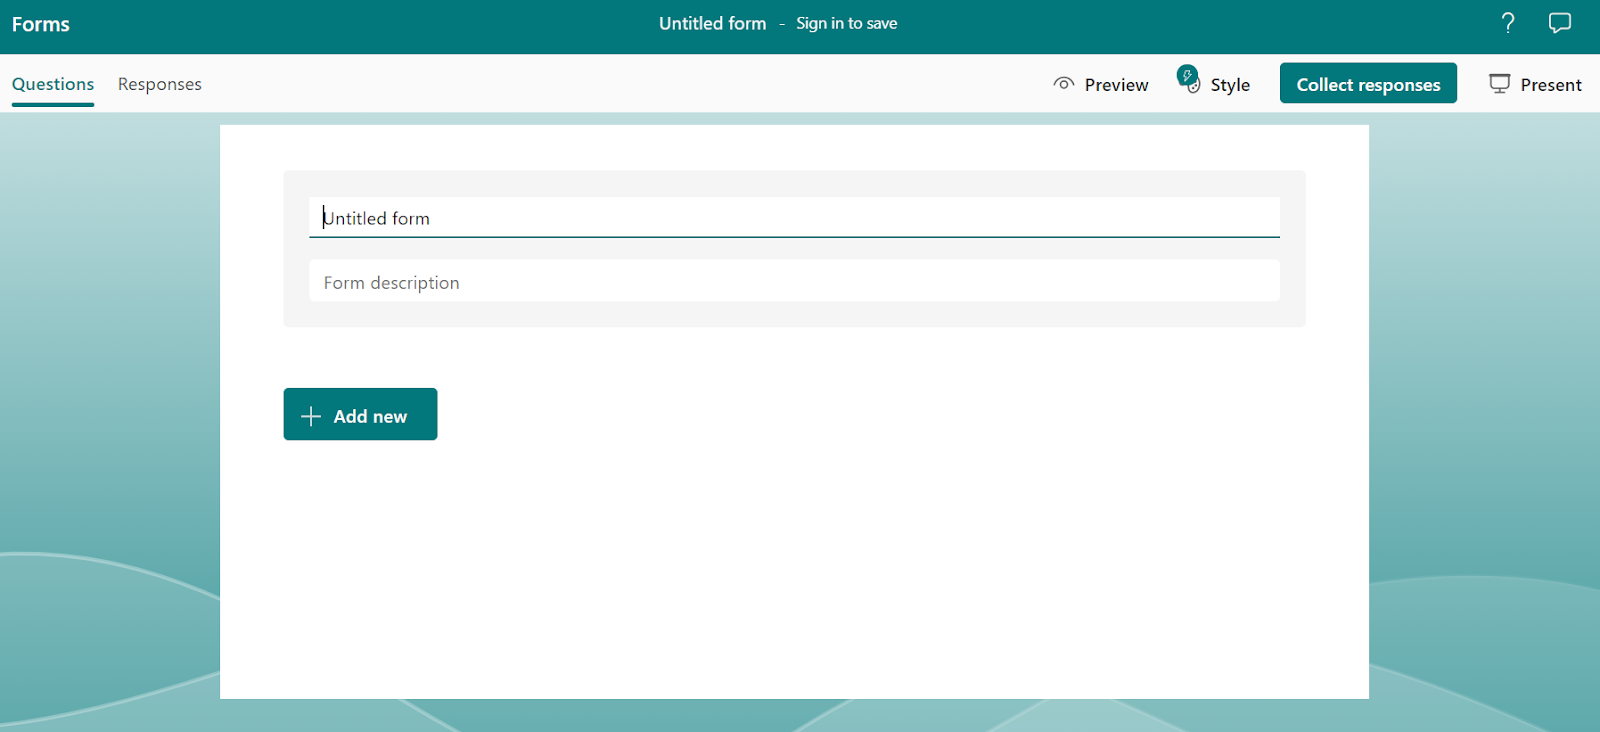
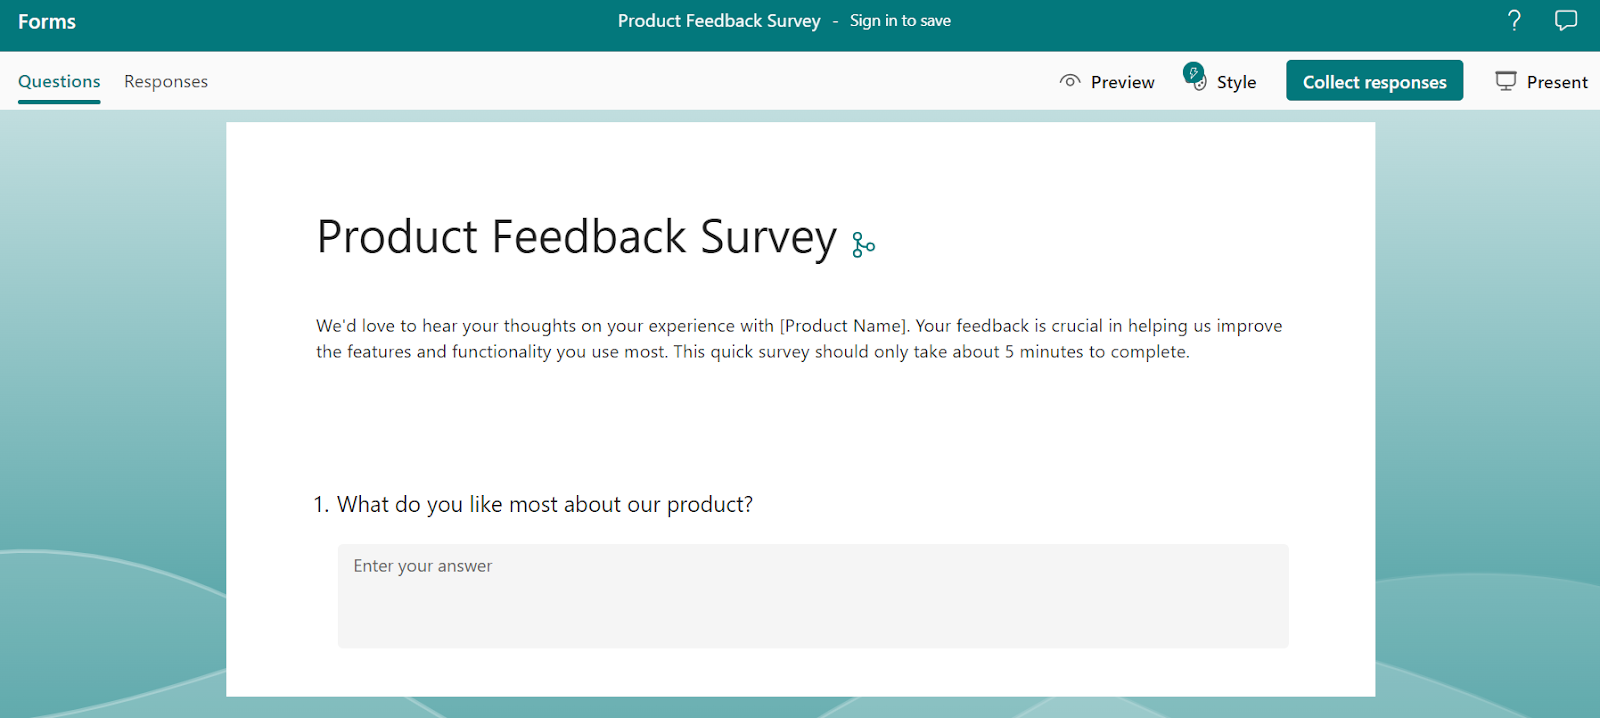
At the top of your blank form, you'll see the text "Untitled Form." Click on this text to begin. Type in a clear and concise title for your survey. The title should give a quick idea of what the survey is about.
For example, if you are gathering feedback on a new product, you might title it "Product Feedback Survey."
Below the title, there's space to add a description. Click on "Add description" and type in a brief explanation of the survey.
This is where you can provide more details, such as the survey’s goal, how long it will take to complete, and any important instructions. The survey description should be limited to 1,700 characters.
3. Add questions
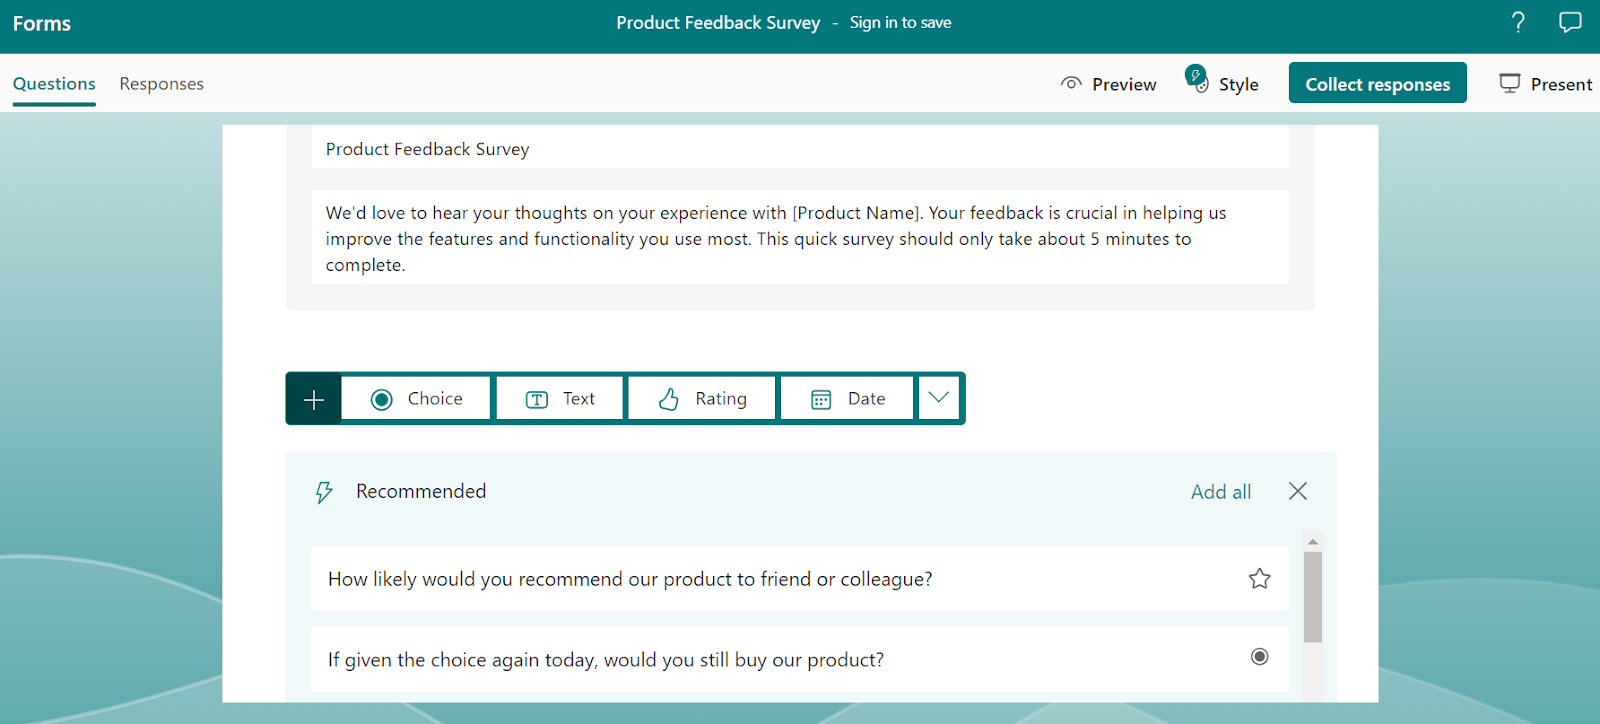
As you type your title and description, Microsoft Forms analyzes the keywords and phrases you use. Based on that analysis, it suggests relevant question types that might fit your survey's goal.
If you see a recommended question that fits your survey, click on it to add it to your form. You can edit the question if needed to better match your needs.
If none of the recommended questions are suitable, you can always create your own.
Click on the “+ Add new” button to create a new question. Make sure you select the desired question type from the options available on the right side of the + button.
Continue adding questions until your survey is complete. Use a mix of question types to keep the survey interesting and gather different kinds of information.
4. Customize question settings
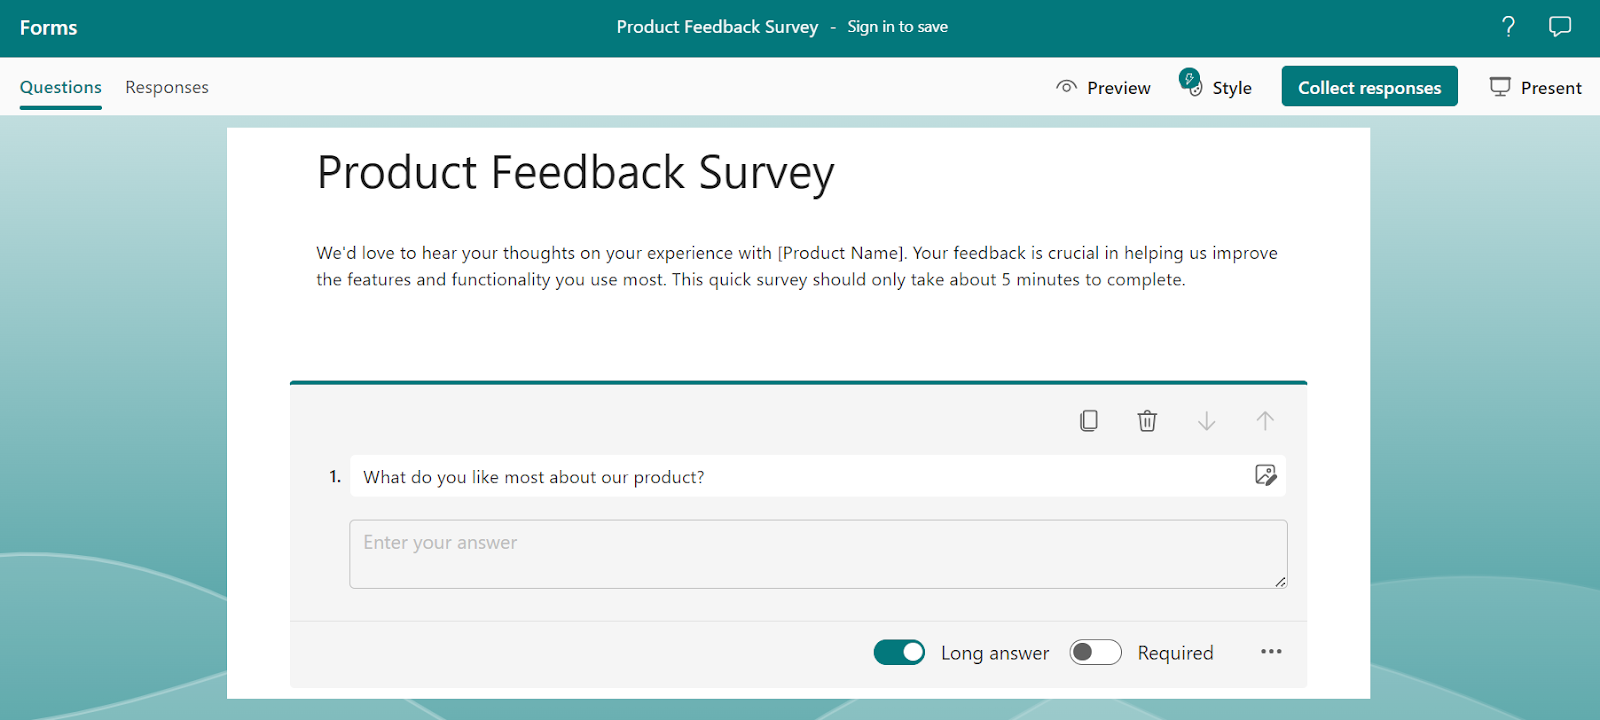
For each question you add, you can customize the settings. You might want to make a question required so that respondents must answer it before moving on.
You can also add options for multiple-choice questions or adjust the number of stars for rating questions.
Set restrictions
Want to make sure people answer your question in a specific way? Restrictions come in handy here! With restrictions, you control the type of responses you get to ensure they are relevant and useful.
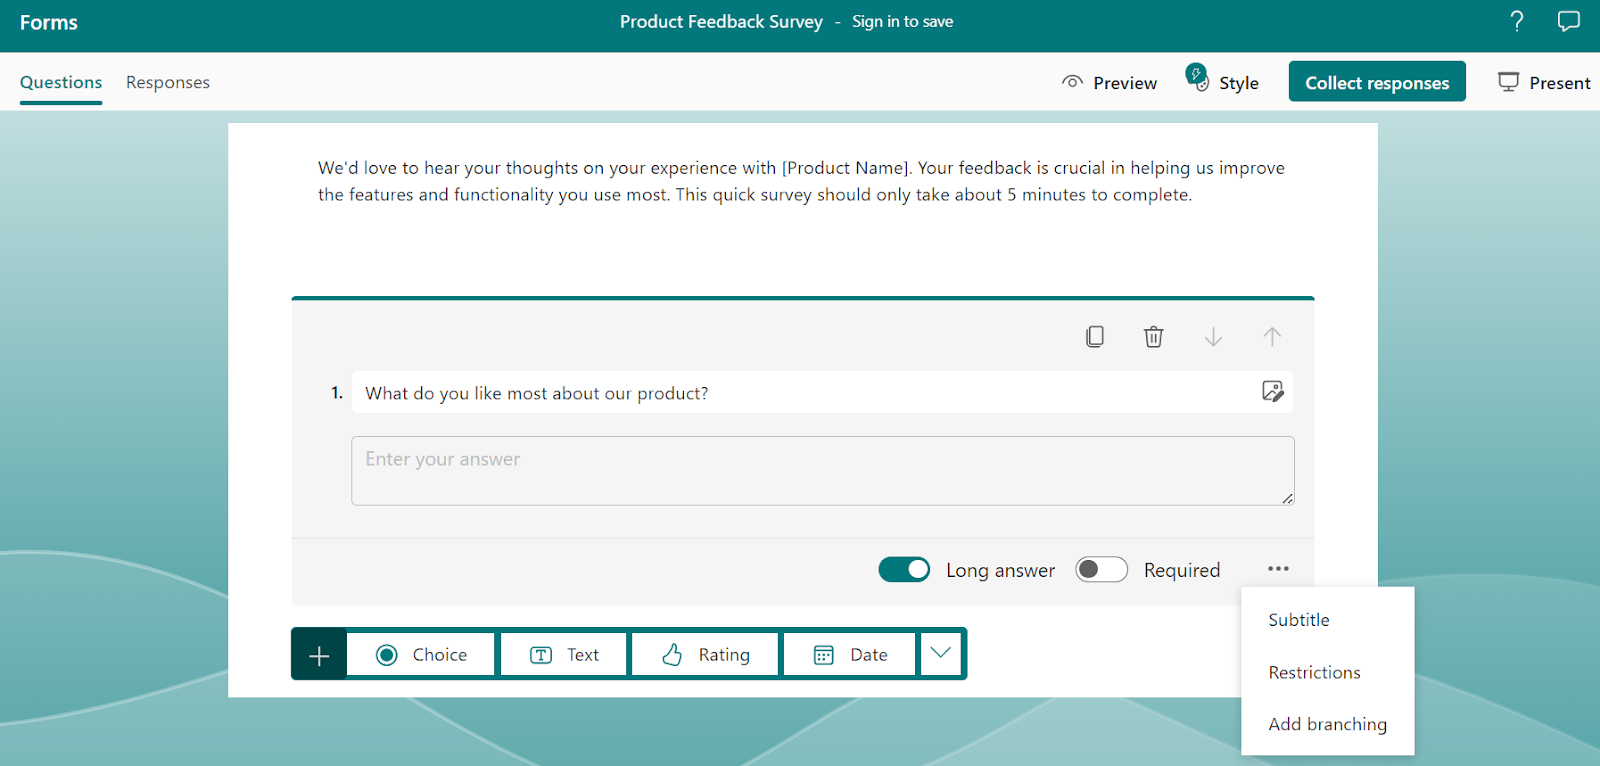
Select the question you want to set restrictions for. Click on the three dots (more options) next to the question. Choose "Restrictions" from the menu.
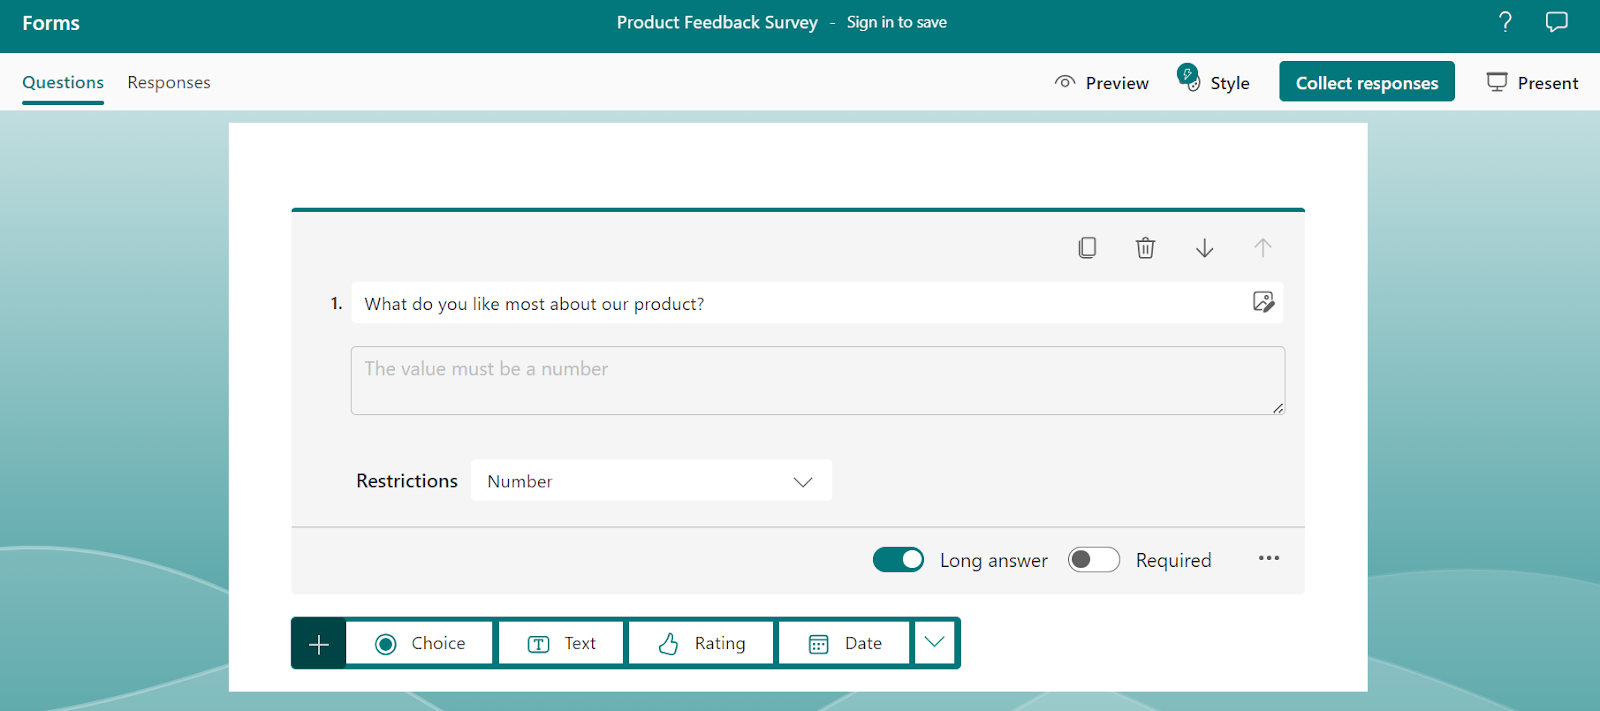
Depending on the question type, you can set restrictions. For example, for a text question, you can restrict responses to numbers only or set a maximum character limit.
Add branching
Branching is a survey logic feature that allows you to direct respondents to different questions based on their previous answers. It makes the survey more interactive and relevant.
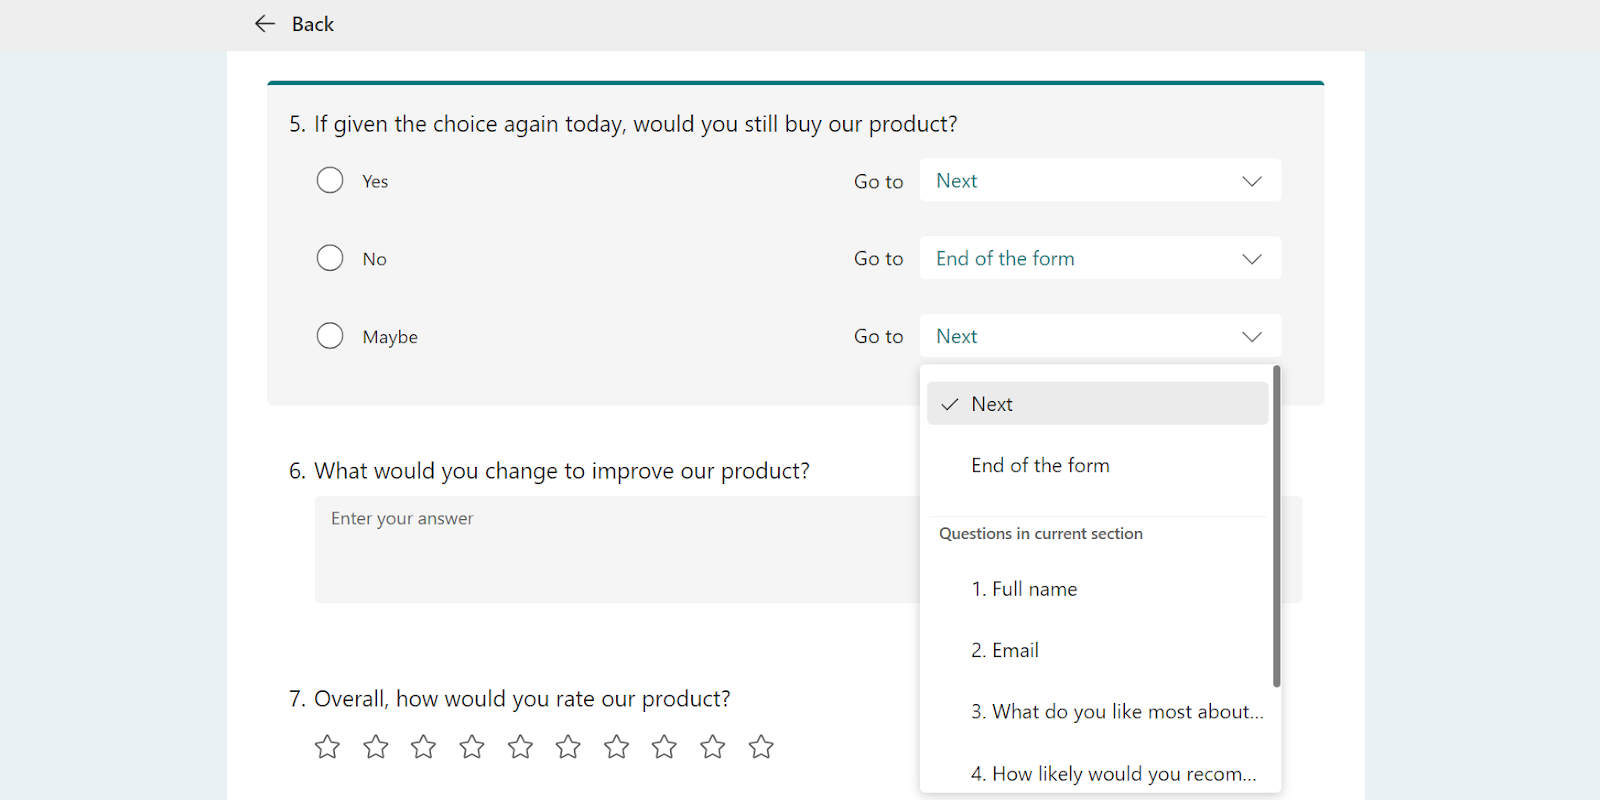
Select the question you want to add branching to. Click on the three dots (more options) next to the question. Choose "Add branching" from the menu. You will see options to choose where respondents go based on their answers.
For example, if they answer "Yes," they might go to the next question. If they answer "No," they might skip to the end of the form.
You may also direct them to some other questions within your survey. Once you’ve set up the branching rules, click "Save" to apply them.
5. Preview your survey
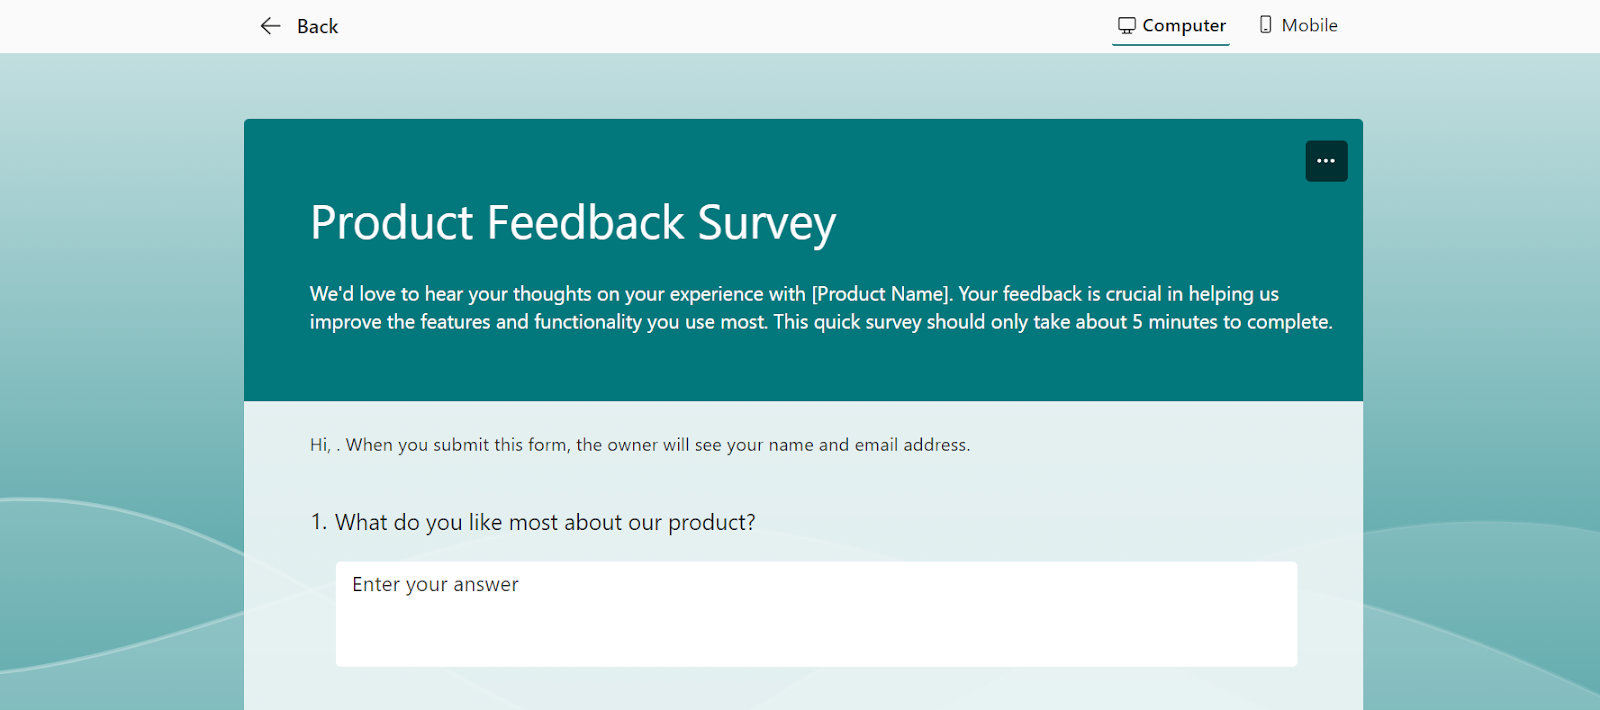
Previewing your survey is an essential step before sharing it. At the top of your Microsoft survey form screen, you’ll see a button labeled "Preview."
When you click "Preview," you’ll see your survey as your respondents will. Microsoft Forms allows you to switch between different device views, such as computer and mobile.
Click on the icons to see how your survey looks on a phone or a tablet.
Go through the survey as if you were a respondent. Answer each question to see if everything works as expected. Check that:
- Required questions are marked with an asterisk and must be answered.
- Branching logic takes you to the correct questions based on your answers.
- Restrictions work properly (e.g., text fields accept only numbers if that’s the restriction you set).
If you find any problems or areas for improvement, go back to the editing mode. Click on the "Back" button to return to your form. Make the necessary changes and preview the survey again.
6. Share your survey
After creating and previewing your survey, it's time to share it with others. Sharing your Microsoft survey is simple and offers multiple ways to reach your audience.
At the top of your Microsoft Forms page, you’ll see a "Collect Responses" button. Click on this button to open the sharing options.
Here are a few ways you can share your survey:
- Share Link: Copy a link to your survey that you can paste into an email, a message, or a social media post. Click "Copy" to get the link.
- Email: Send the survey directly via email. Click the email icon, enter the email addresses, and send.
- QR Code: Generate a QR code that people can scan with their phones to access the survey. Click on the QR code icon to download or copy it.
- Embed: Embed the survey into a website or blog. Click on the embed icon, copy the HTML code, and paste it into your website’s code.
Limitations of MS forms
Microsoft Forms for survey is a great tool for creating questions and collecting responses, but it does come with some limitations.
- Maximum Number of Forms: MS Forms limits the number of forms you can create. For most users, this limit is 200 forms per account. If you plan to create many surveys or quizzes, you might hit this limit sooner than expected.
- Response Limits: There are limits on the number of responses you can collect. For example, the maximum number of responses is 50,000 per form for Office 365 Education and Microsoft 365 Apps for Business users. Those using MS Forms survey with Microsoft accounts (Hotmail, Live, or Outlook.com) can only accept 200 responses per form on free accounts and 1000 responses per form on paid accounts. If you expect a large number of participants, this could be a constraint.
- Limited Question Types: While Microsoft survey form offers a variety of survey question types, it doesn’t support some advanced question formats such as matrix questions.
- Not the most stylish: You can customize the look of your survey a bit, but Microsoft Forms doesn't offer the same level of design flexibility as some other survey tools. So, if you're looking for a super polished and visually stunning survey, a Microsoft survey might not be your best bet.
Use Formaloo’s advanced survey maker instead!

If you’re looking for more advanced features than Microsoft Survey, greater customization, and an unlimited number of forms and responses per user, consider using Formaloo.
Formaloo is the perfect Microsoft Forms alternative. Why? It is an easy-to-use survey builder that offers a wide range of question types and more.
It also allows for extensive customization, so you can create surveys that perfectly match your brand and target audience.
Plus, Formaloo provides tools to manage your form responses, analyze data, and generate insightful reports.
Give Formaloo a try for your next survey, and you’ll not be disappointed!


