

Setting up a portal used to mean one uncomfortable choice: leave it open to anyone with the link, or restrict it to a list of emails you manage by hand. If you wanted to limit access to people from a specific organization, say, a corporate domain, you had to manually approve every signup or build workarounds outside Formaloo. This release closes that gap properly.
Portals now support three new signup controls, and they work together.
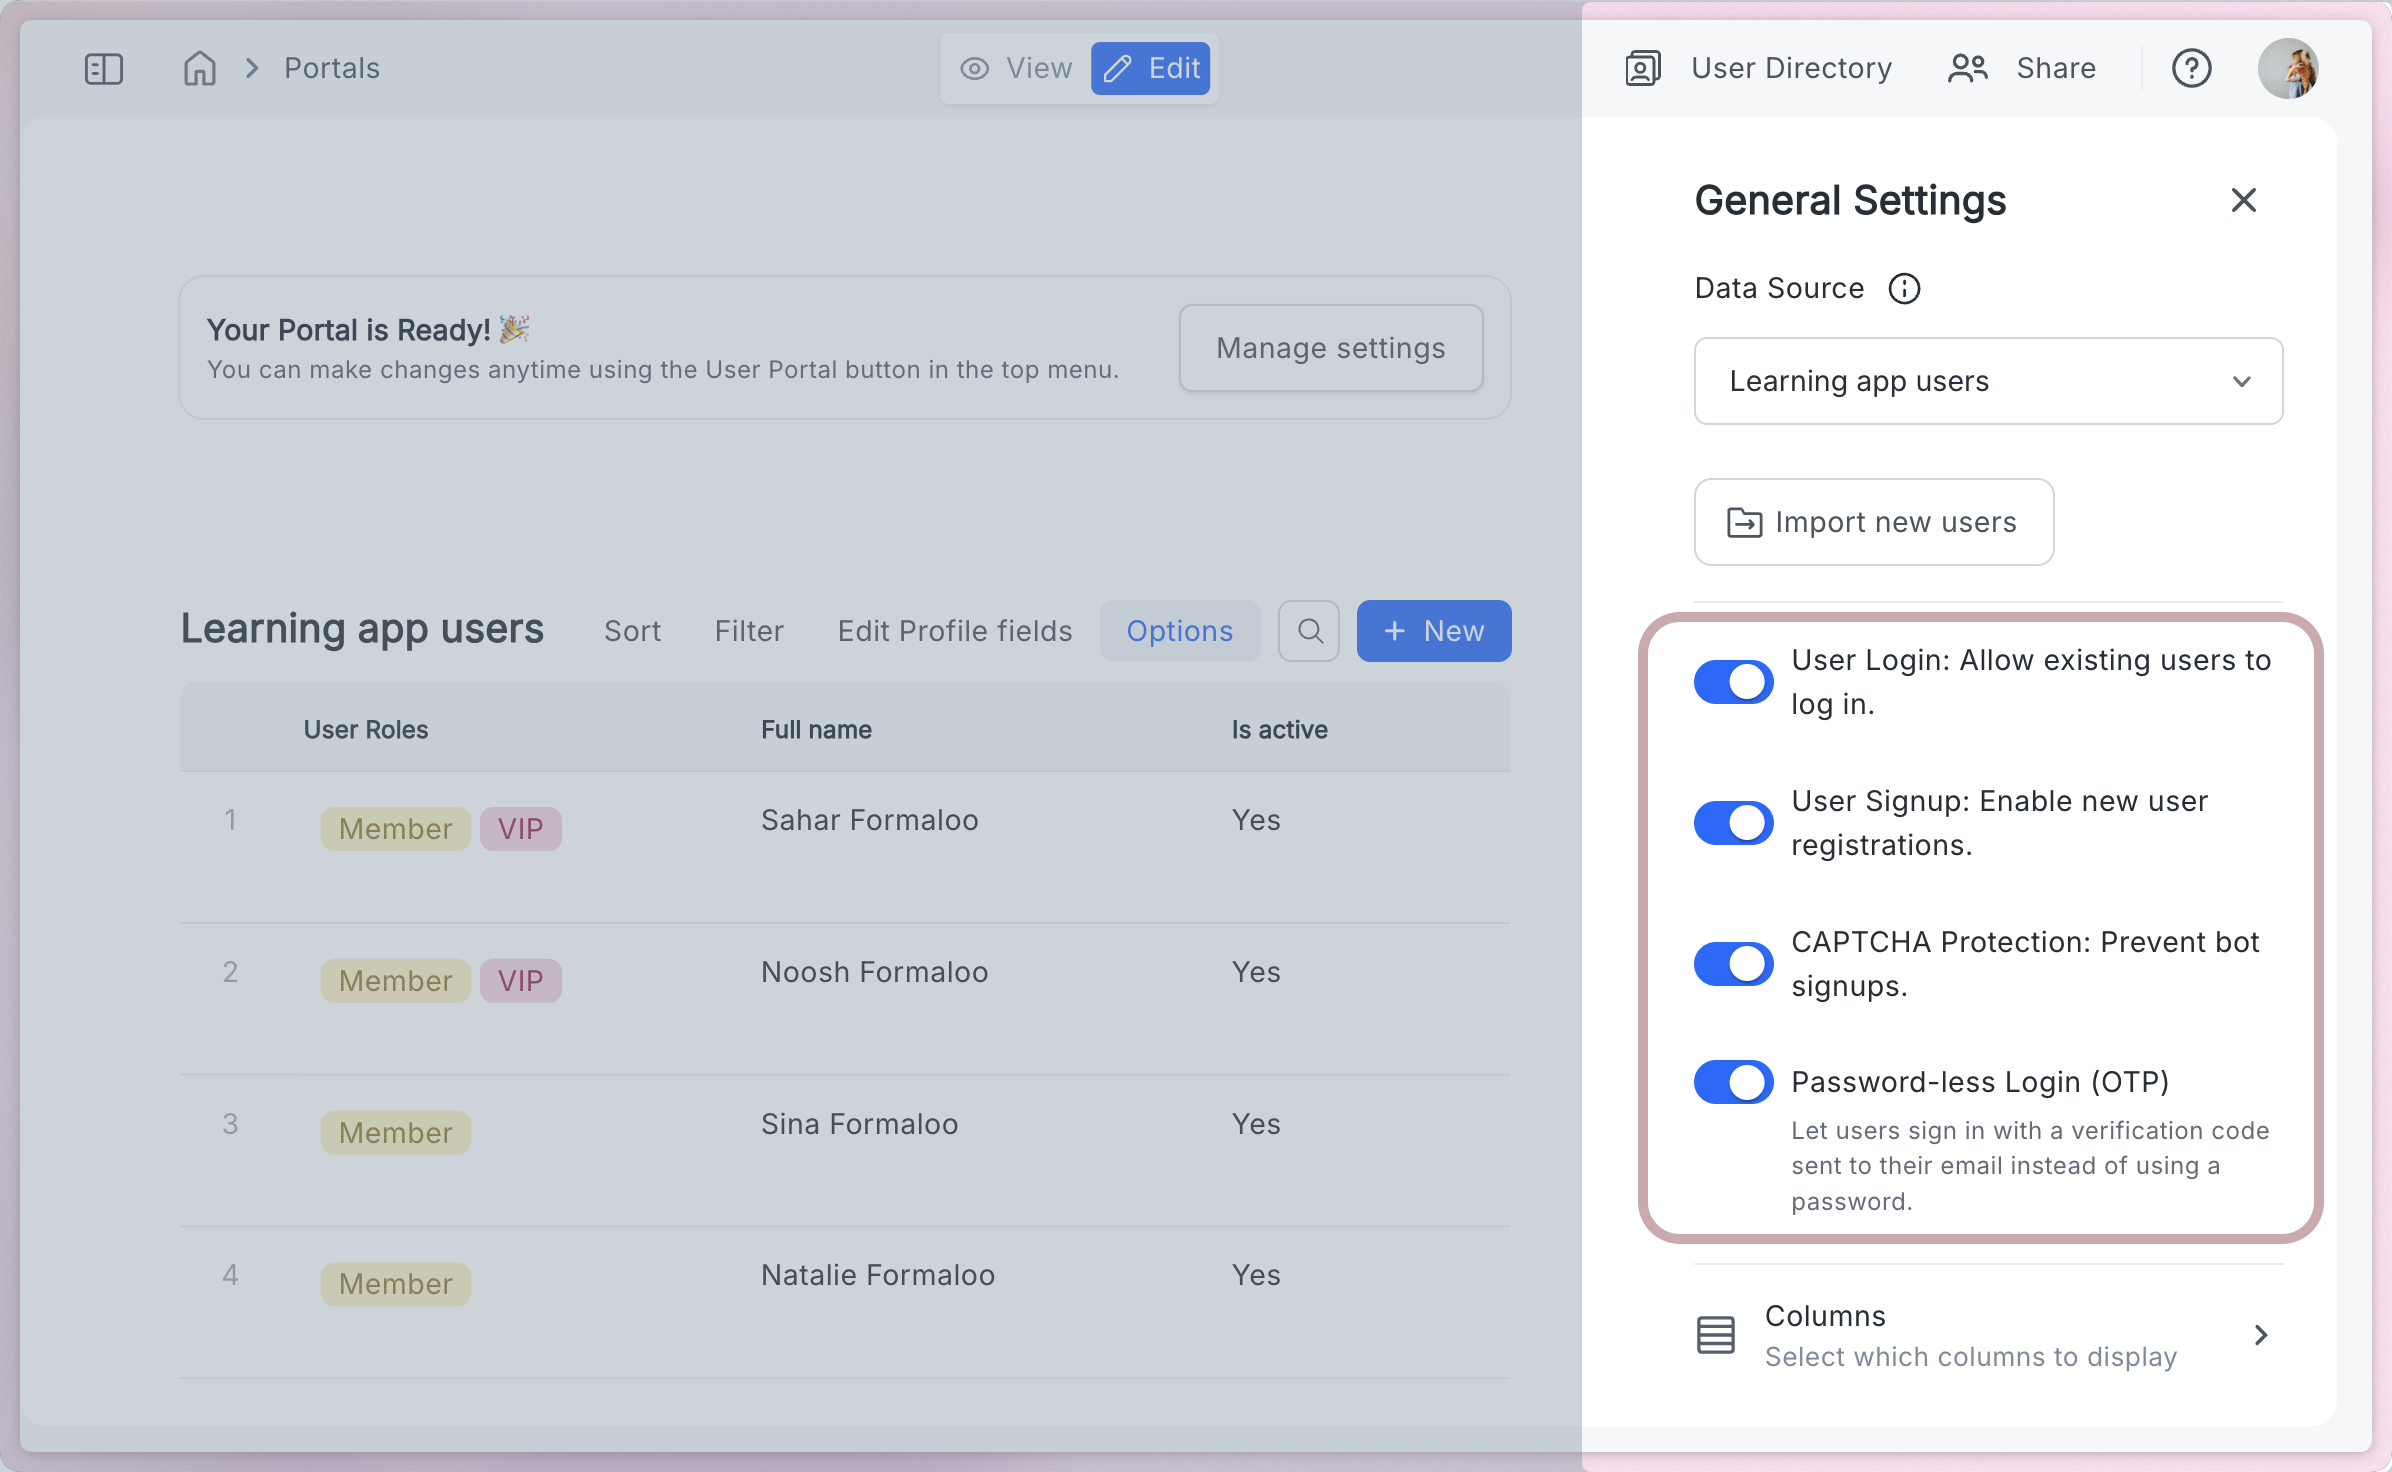
First, you can define acceptable answer rules for the email field on your portal's signup page. That means you can restrict signups to specific email addresses or entire domains using regex patterns. A company intranet portal can require @yourcompany.com. An education portal can require .edu addresses. Anyone who tries to sign up with a non-matching email sees a clear error and never gets in.
Second, Magic Link sign-up is now available. Previously, Magic Link only worked for existing portal users logging back in. New users had no path to register that way. Now they do. A new visitor enters their email, receives a one-time link, and lands inside the portal as a registered member, no password, no separate invite step.
Third, these two features compose. You can require a domain-restricted email AND deliver access via magic link. That combination gives you a lightweight but controlled signup flow: only the right people can register, and they do it without a password.
What changed:
Answer piping has been in Formaloo for a long time. The problem was discoverability. To pipe a field's value into an email subject, a PDF, or a form message, you had to know the exact field ID, remember the syntax, and type it correctly. One typo and the pipe broke silently.
Now, typing @ in any supported editor opens a suggestion menu. It lists every field in your form with a valid ID, plus all system variables (submission date, respondent email, payment status, and others). Start typing after @ and the list filters in real time. Arrow keys or a click inserts the value. The full @field_id token lands exactly where your cursor was.
The menu works across every surface where answer piping is supported: form field titles and descriptions, the ending page, email templates, PDF templates, and AI prompt boxes. In email and PDF editors where no specific form is loaded, it shows the predefined system variables only.
What changes:
Starting from scratch is the slowest part of building a form. If you already have a paper form, a PDF questionnaire, or even a photo of a printed document, you now have a faster path.
Inside Magic Create, there is a new upload section above the AI prompt. Upload a PDF, Word document, or image (PNG, JPG, JPEG), and Formaloo AI parses it, extracting field labels, input types, sections, and structure — then generates a ready-to-edit form. You can add a text description alongside the file to give additional instructions, or use the file alone.
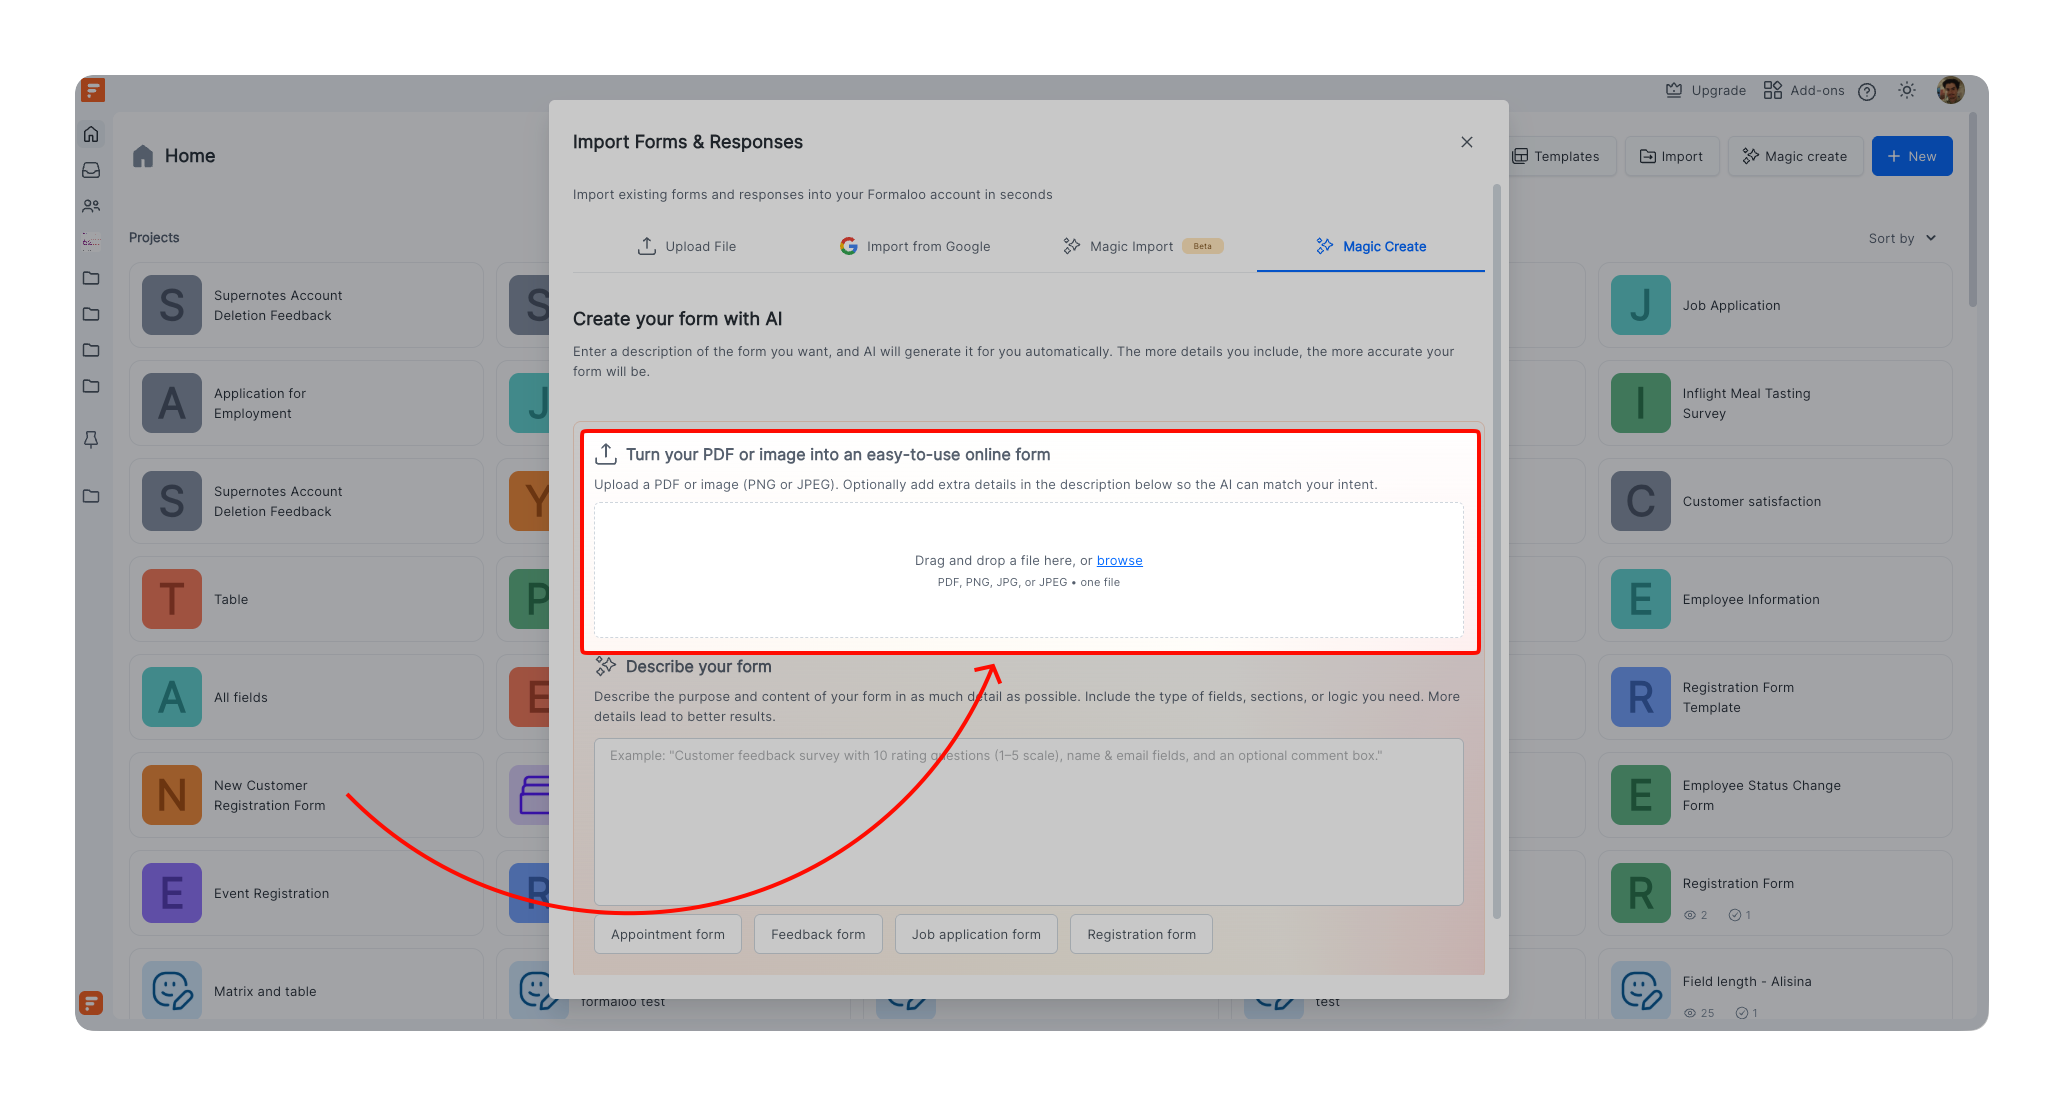
If the file cannot be parsed, a fallback message prompts you to add a description to guide the AI. The generated form opens directly in the form editor.
What changes:
We ship every week. Follow our changelog to stay up to date.

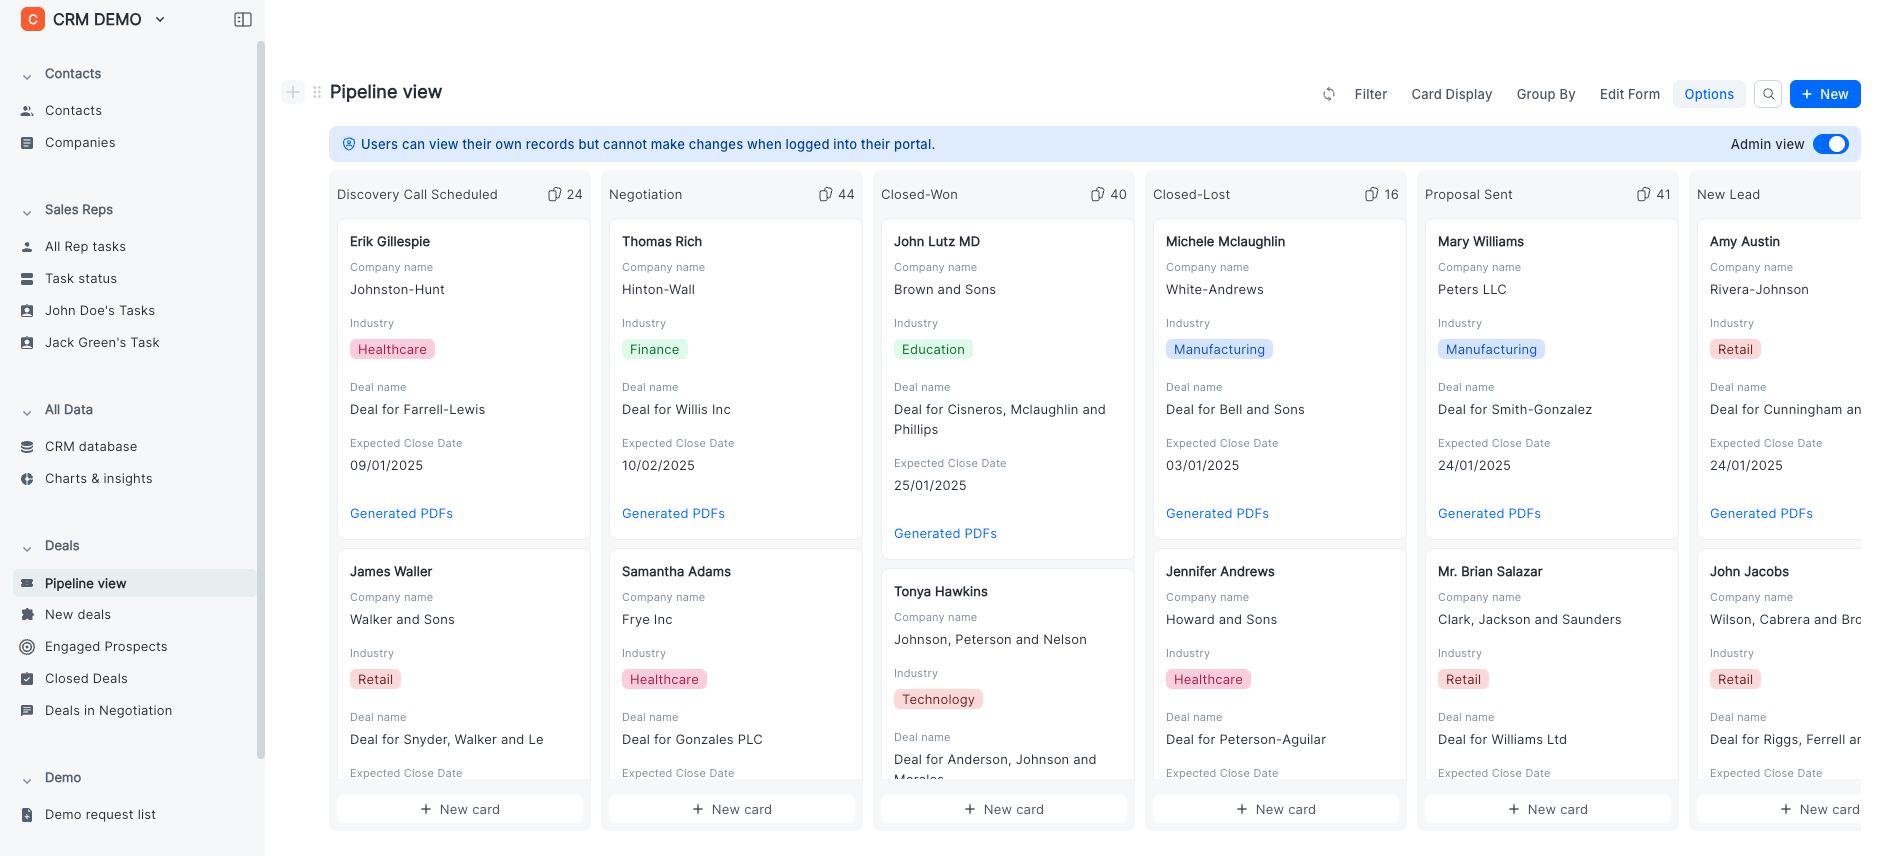
If you've ever used Formaloo to run a roadmap board, collect feature requests, or manage submissions from external users, you've probably hit the same wall: you can display the cards, but you can't ask people to weigh in. Prioritization meant exporting data, running polls elsewhere, or just guessing. This release changes that.
Kanban and Gallery views can now display upvote buttons on each card. When enabled, users vote for the items they want to support and the cards sort automatically by vote count.
To turn it on, open the block settings on any Kanban or Gallery view and enable Voting. You'll also choose who can vote: internal users (your workspace members), external users (portal visitors), or leave it open to both. Users outside the allowed audience can still see vote counts, but cannot cast votes.
Each eligible user gets one vote per card. Clicking again removes it. In Gallery, cards reorder globally by vote count. In Kanban, cards reorder within each column, so the most-supported items rise to the top of every stage.
This works for team prioritization and for customer-facing boards. A team reviewing roadmap items can surface what the group actually wants to build next. A public-facing feature request board lets customers signal their priorities directly, inside the same portal where they submitted.
What changes:
Every form builder has made the same mistake: added a Text field when they meant Email, or a Dropdown when they needed Multi-choice. Until now, fixing it meant deleting the field, rebuilding the configuration, and losing any collected data. You can now change a field's type directly from the form editor.
Click any field, open the type dropdown, and select a different type. A warning popup appears first. It explains that some response data may not survive the conversion, and it includes an option to export responses before confirming. If the data is compatible with the new type, it carries over. If it is not, only that field's data is cleared across all collected rows.
Field properties migrate automatically where they apply. Title, description, ID, width, required status, help text, and choices all carry over if the new type supports them. Converting a Dropdown to a Single Choice keeps all existing choices intact.
What changes:
Building a PDF template used to mean generating the actual PDF to see how it looked. Same for email templates. Every test drew from your add-on credits, even when you were just checking spacing or adjusting a variable. With add-on credits now visible in the product, that friction matters more.
There is now a test mode for both. In the email template editor, a "Send test" option lets you send to yourself or any address without counting toward your email credits. In the PDF builder, a preview mode renders the template using sample submission data with no credit charge. Iterate as many times as you need before going live.
What changes:
Enterprise workspaces can now customize the left sidebar navigation and pin projects for the entire team.
Workspace admins can add custom menu items with a title, icon, and URL. They can hide default items (Home, Activity, Shared with me) that are not relevant to the workspace's workflow. They can also set a workspace homepage so every member lands on the right page when they open Formaloo.
Workspace-level pinning works alongside the new sidebar controls. When an admin pins a project, a popup asks whether to pin it personally or for the whole workspace. Workspace-pinned projects appear for all members and cannot be unpinned by non-admins. Any admin can remove a workspace-level pin, which removes it for everyone.
What changes:
The field picker now includes a Contact Info shortcut. Selecting it adds four fields in one step: First name, Last name, Email address, and Phone number. All four are created at 50% width, arranged in two rows. Each field is a standard type and can be edited, moved, or deleted individually after creation.
What changes:
We ship every week. Follow our changelog to stay up to date.
Design configuration used to be one of those silent time sinks in Formaloo. Every new form — same colors, same font, same logo, same custom CSS — set up from scratch. For teams managing dozens of forms, that adds up. This release addresses it properly.
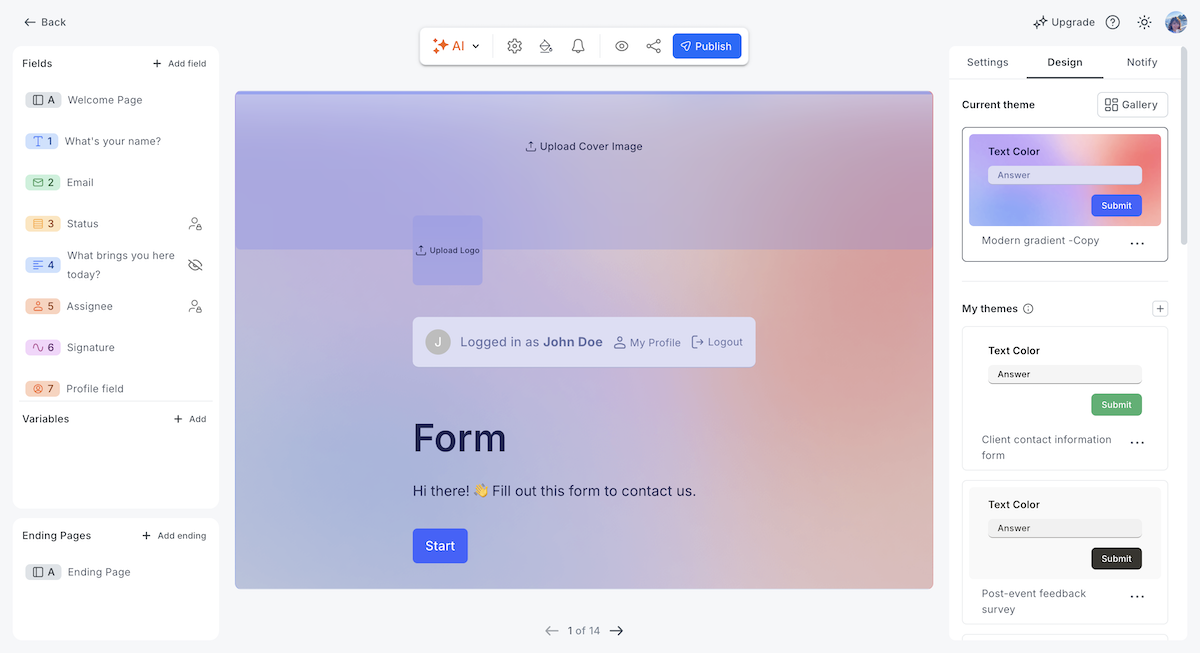
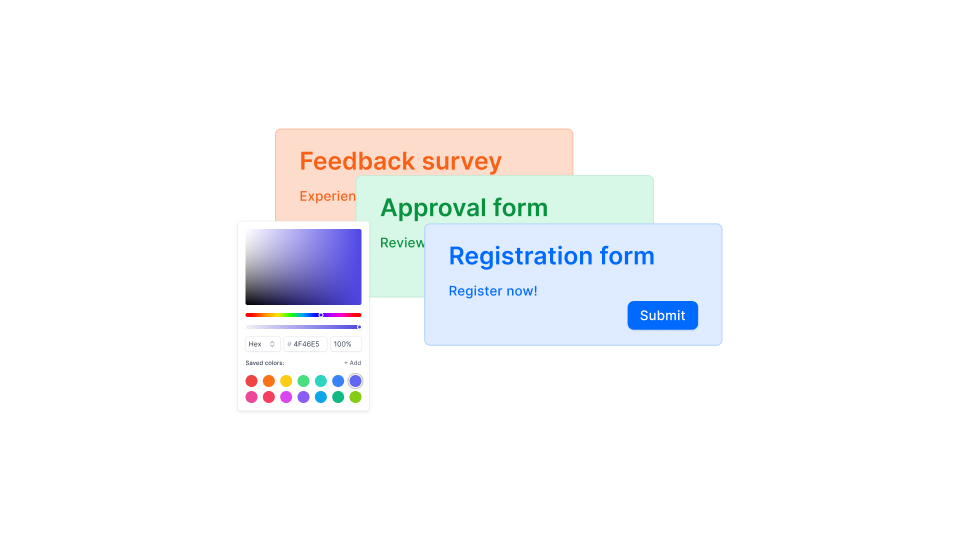
Formaloo now has a workspace-level Themes system. A theme is a complete design kit: form type and layout, form width, spacing between fields, color palette, font and font size, corner roundness, background image, progress bar settings, logo, default cover image, and custom CSS. Create a theme once, attach it to any form, and when you update the theme, every connected form reflects the change instantly.
Every new form requires a theme. There is no more standalone per-form design configuration — all design changes update the theme. When you edit a shared theme, Formaloo tells you how many forms it's connected to and gives you two options: continue editing (which updates all of them at once) or duplicate and edit independently. Deleting a theme requires you to reassign its forms to a replacement first.
The Design tab inside the form editor now has two sections: My Themes, which shows all your workspace themes with full create, edit, duplicate, rename, and delete options, and a Gallery of pre-built system themes you can apply directly or duplicate and customize.
Agencies can create a separate theme per client and apply it across all forms for that client. Update the client's brand — one change updates every form.
What changes:
Formaloo now has a Usage page, a single place to see what your workspace is consuming and to top up exactly what you need, without changing your plan.
The page shows your usage across every key dimension: forms created, monthly submissions, team member seats, external user seats, AI credits, custom email credits, custom PDF credits, cloud storage, and data enrichment rows. Each item shows how much you've used and your current limit, side by side, with a visual progress bar. For monthly limits like submissions, the counter reflects the current period only.
When you need more capacity, you can purchase an add-on directly from the page. Available add-ons: Whitelabel features (custom domain, custom CSS, badge removal from forms and apps), extra cloud storage, additional team member seats, additional external user seats, AI credits, custom email credits, and custom PDF credits. Credit-based add-ons — AI, email, and PDF — don't expire. They stay in your account until you use them.
The Usage page is visible to all workspace members. Only workspace admins can make purchases.
What changes:
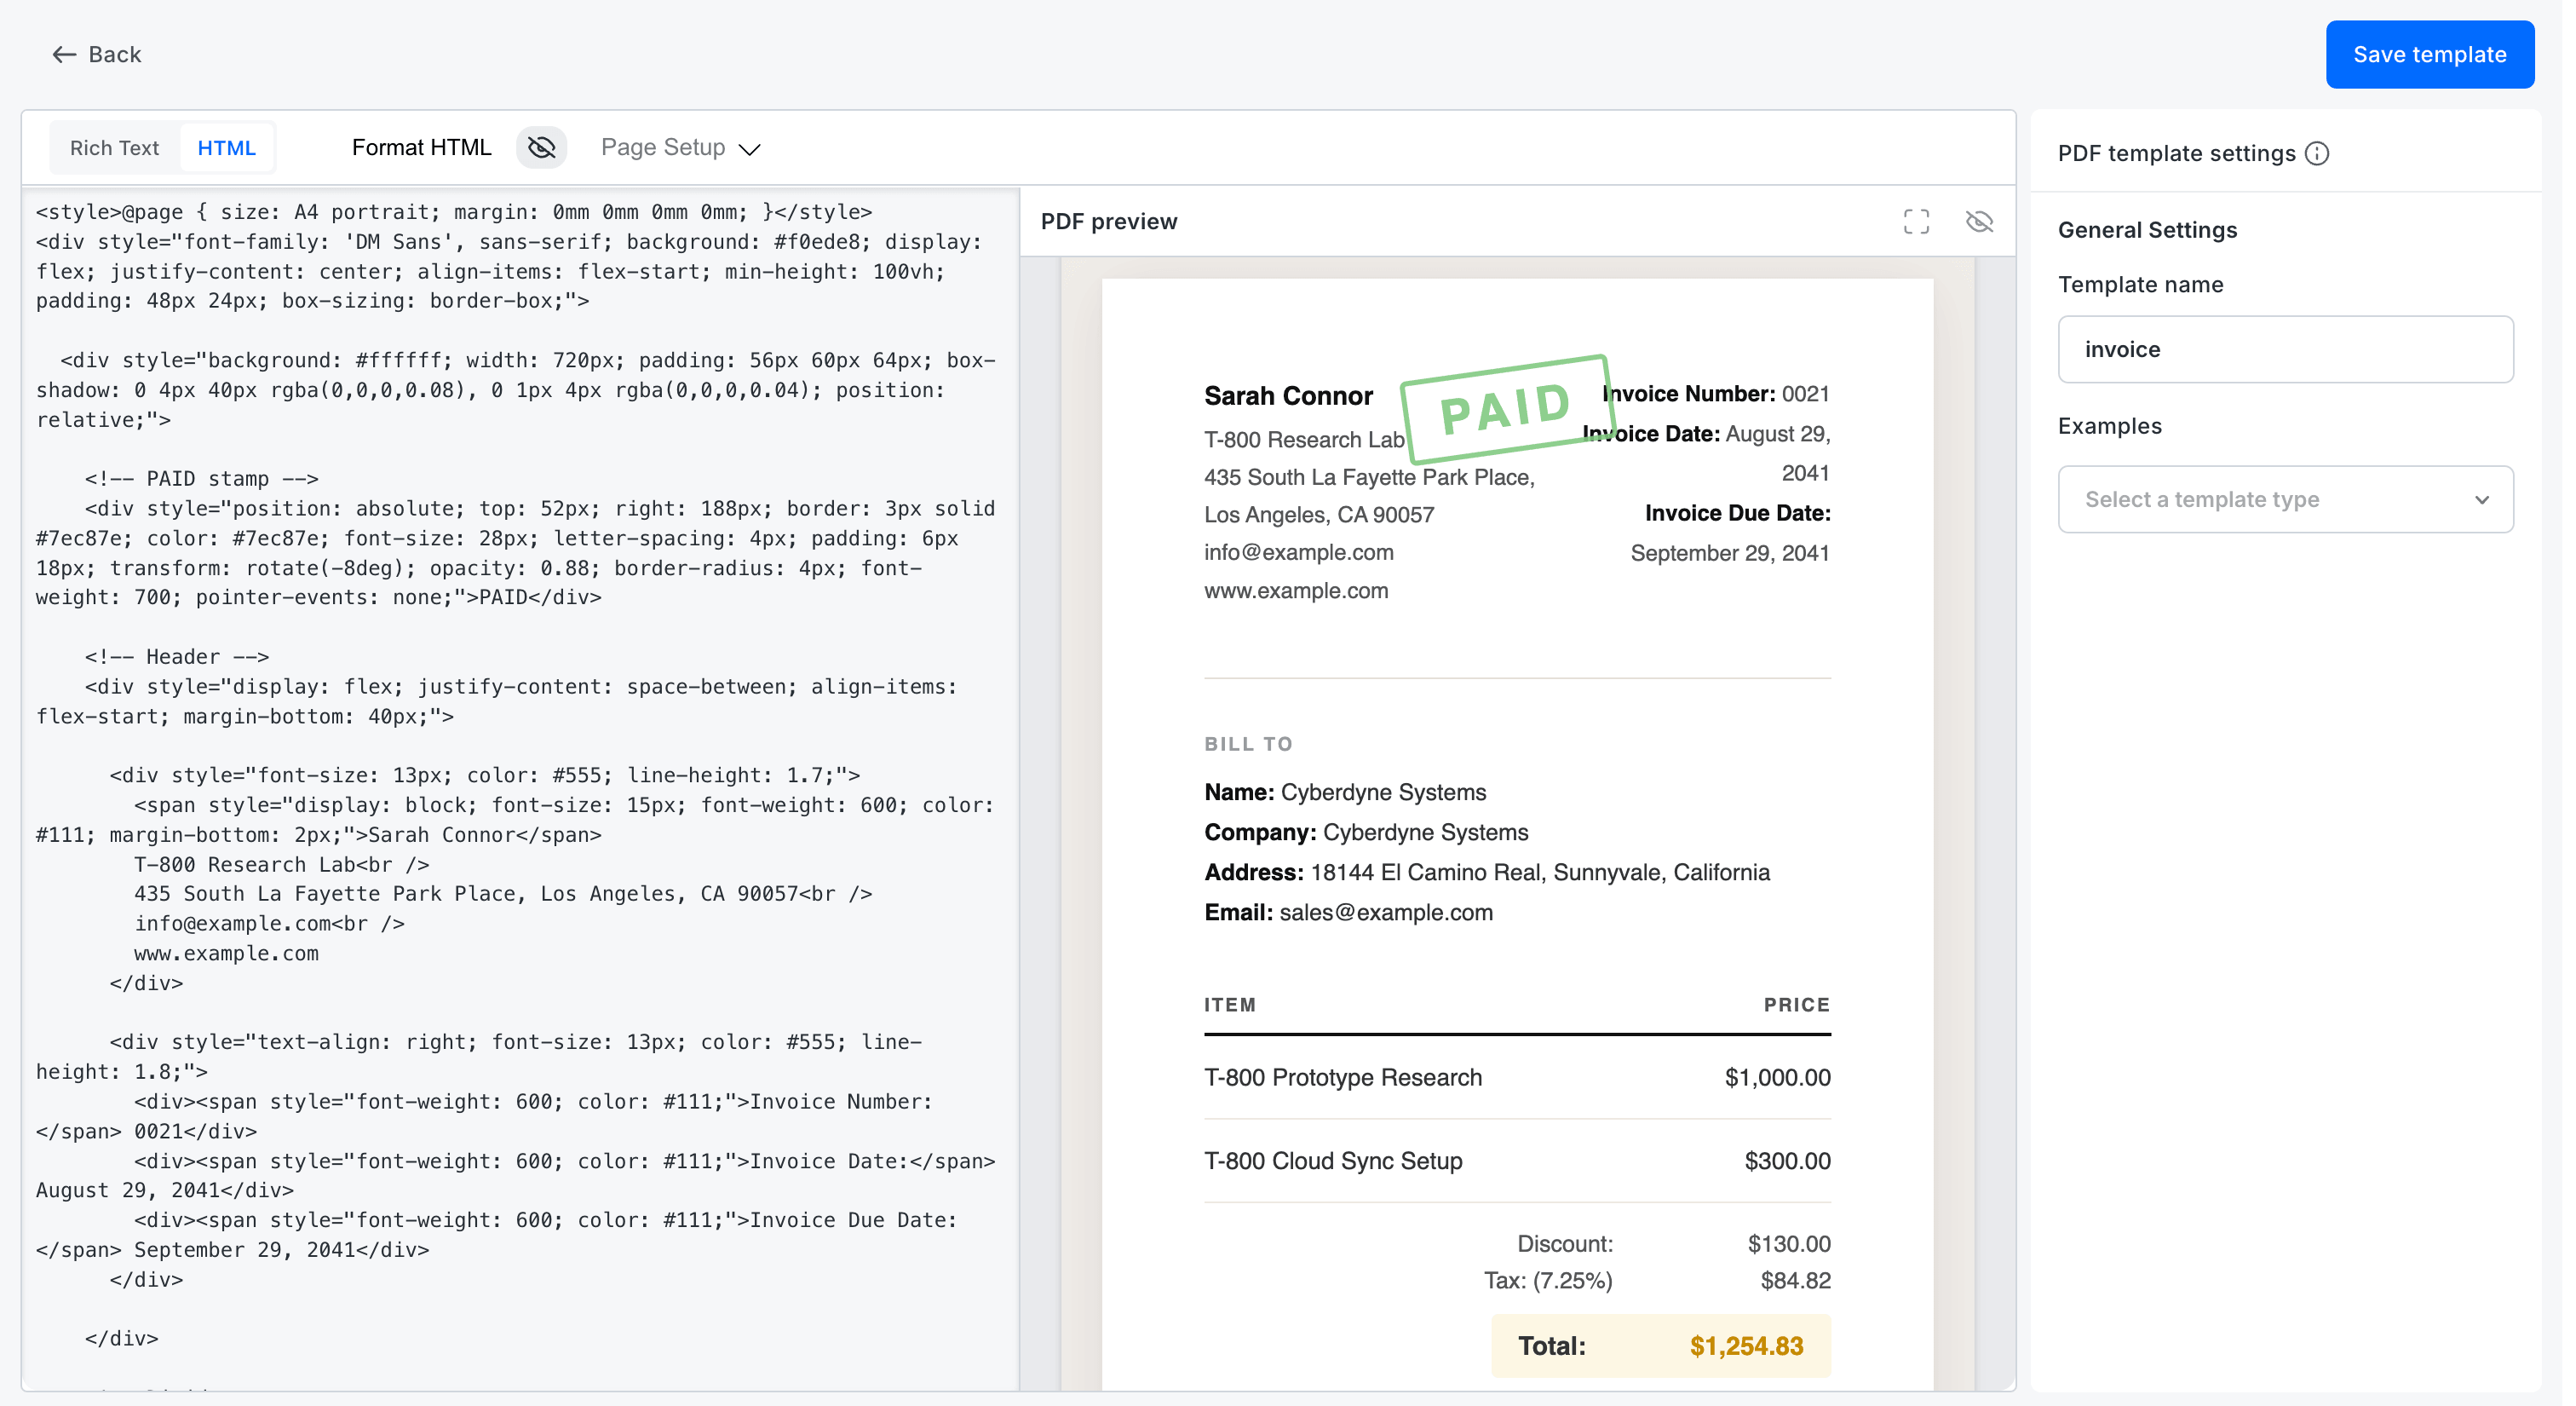
The PDF template editor now works in two modes: Rich Text and HTML.
In HTML mode, you write or paste raw HTML on the left and see a live PDF preview on the right. The preview updates as you type, renders your full design — fonts, colors, images, dynamic fields, and layout, and marks page breaks with blue lines so you know exactly where the PDF will split.
The HTML mode makes AI-assisted template creation practical. You can prompt ChatGPT, Claude, or any AI tool to generate an HTML certificate, invoice, report, or agreement for you, paste the output directly into the editor, and watch it render in the preview. No PDF design tool required.
Text editor improvements also ship across form descriptions, field descriptions, content blocks, section fields, and form ending pages.
What changes:
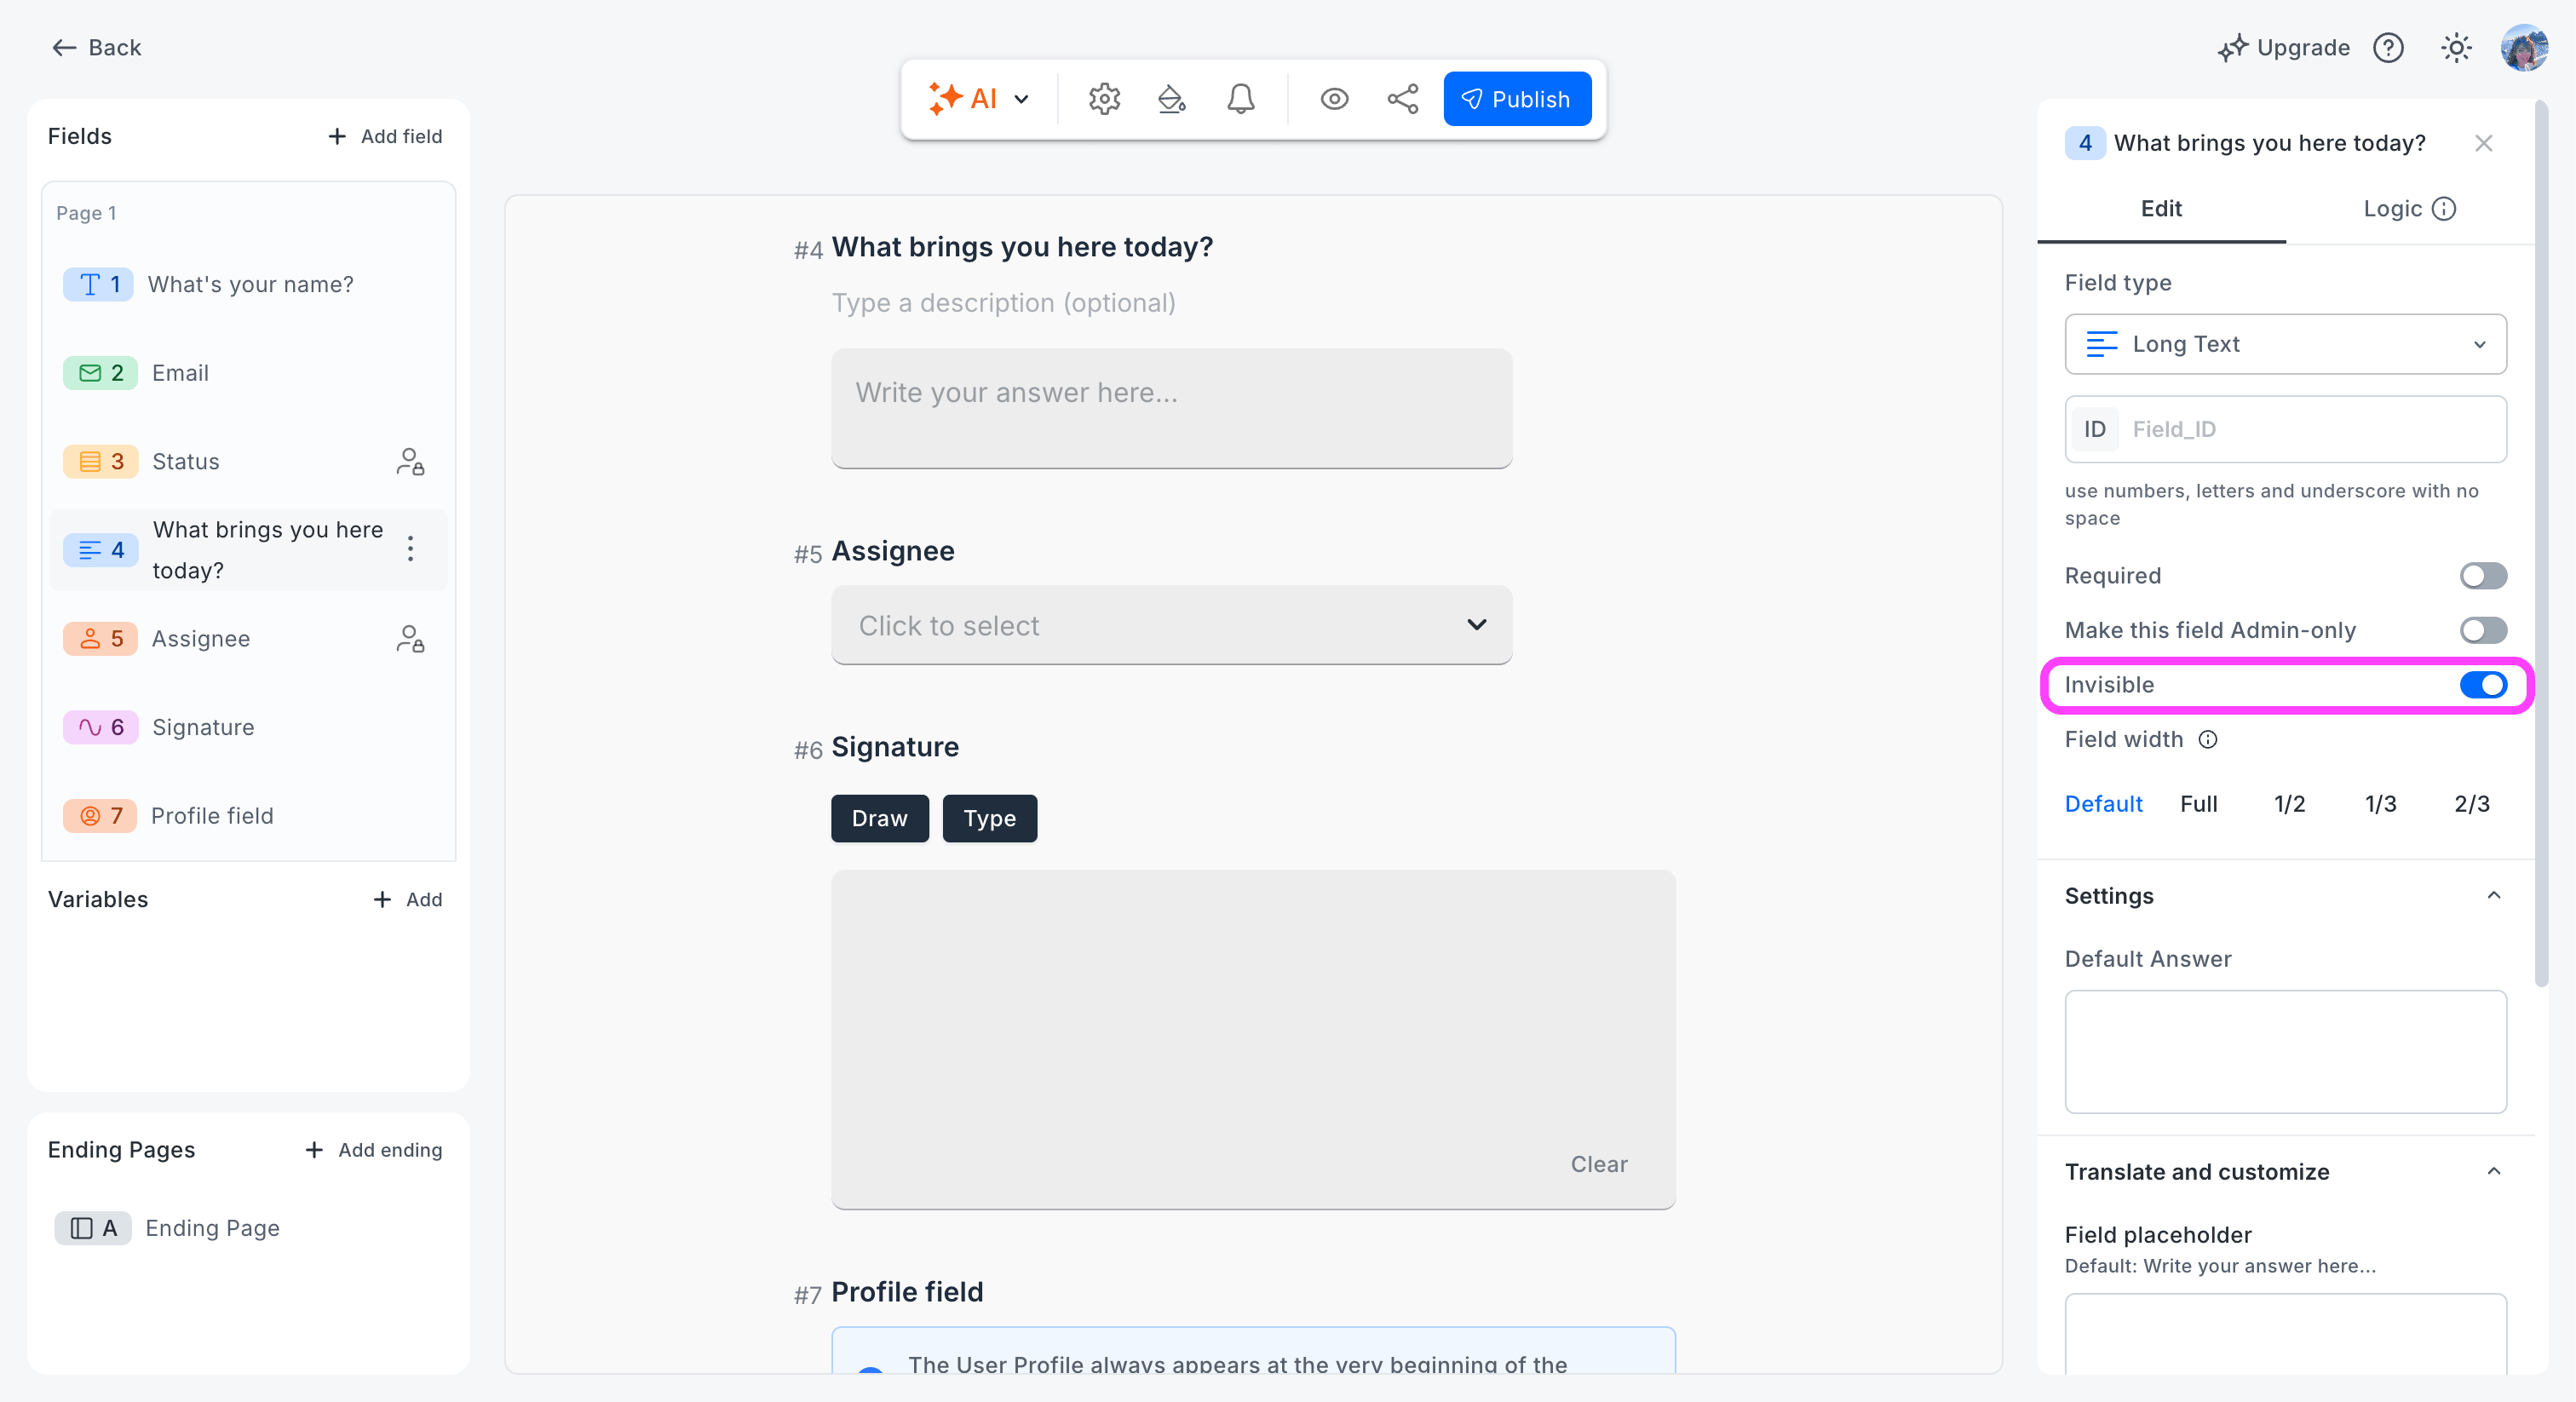
Every field type in the form editor now supports an "Invisible field" toggle. When enabled, the field stays completely hidden from respondents but remains fully active everywhere else: it receives values via URL parameters or answer piping, participates in logic rules, stores data in data blocks, and can be marked as required or admin-only. The form editor shows a visual indicator on any field set to invisible so builders always know what respondents can and can't see.
The invisible state is absolute, it always takes priority, even if a logic rule attempts to show the field. This is intentional: if you mark a field as invisible, it stays invisible regardless of any show/hide conditions.
Useful for: UTM and campaign tracking fields, internal IDs, pre-filled scoring variables, referrer fields, metadata, and any field you want to keep active without surfacing to respondents.
What changes:
@answered and @results_table piping parameters now render with consistent formatting: bold question text, readable row spacing, and sizing that matches the default printable template..formaloo__progress-bar-container now applies correctly in published forms, including position and sizing properties.We're celebrating our community with a giveaway, and everyone who participates gets something.
Leave an honest review on G2, Capterra, or Product Hunt, then submit your review link at formaloo.formaloo.me/ea8ey.
Every approved review earns you one free year of Formaloo Pro and a $10 donation to Relief International on your behalf. One lucky reviewer also wins a brand new iPad Air 2026 (M4) — drawn live on YouTube on May 5th. Review on all three platforms and get three entries.
Deadline to submit: May 4th.
We ship every week. Follow our changelog to stay up to date.
.png)
Timestamps are the backbone of any record-keeping system. For teams spread across time zones, a single misaligned timestamp can mean a report filed at the wrong date, an audit log that doesn't match reality, or a filter that quietly returns the wrong slice of data. We've seen this cause real friction for our global customers, and we fixed it properly.
You can now set a timezone for your entire workspace. Once selected, every system-generated date and time across Formaloo; Created at, Updated at, activity logs, data block filters, the Edit row sidebar, and generated PDFs, reflects your chosen timezone. Your whole team sees identical, consistent values. No more off-by-one-day errors. No more mismatch between what happened and when it was logged.
What changes:
This sets the foundation for more reliable reporting, cleaner audit trails, and stronger enterprise readiness. If your team operates across regions, this one's for you.
We ship every week. Follow our changelog to stay up to date.

This release is headlined by a new Logic action that writes back to your records. Beyond that, A major new Logic action, a smarter project setup experience, a rebuilt data blocks layer, and over a dozen fixes that have been on the list for too long. Here's everything.

Logic in Formaloo has always let you control what users see; show a field, skip a page, route to an outcome. Now it can act on your data too.
The new Update Record action is available on both OnSubmit and OnUpdate triggers. When your conditions are met, Formaloo can automatically write back to a record, updating a Lookup field, a Linked row, or a User profile field, without any external automation tool. See how you can update records across forms using logic in Formaloo.
Here's a real example of what this unlocks:
On update: If Task 1 is Done and Task 2 is Done → Update record → User profile → Role → Manager
No Zapier. No Make. Just your logic, acting on your data.
A few things worth knowing: Update Record can't be nested or looped, we disable those paths to prevent broken flows. There's also a limit on how many row updates a single record can trigger. This action is available on Pro plans and above.
Formaloo can now automatically enrich form responses the moment they come in.
Enable Lead Enrichment from the App Store, connect it to a form, and every new submission that includes an email address gets enriched with third-party data in the background, no manual export, no separate tool.
It works for B2B leads (work emails like name@company.com), enriched with job title, department, company name, industry, revenue range, employee count, company ranking, and more.
You control exactly where the data lands. In the configuration flow, map any enriched attribute to a field in your form, for example, map company_name to your "Company" field, company_revenue to "Revenue," and linkedin_url to "LinkedIn." If you'd rather capture everything at once, there's a "Store All Data" option that consolidates all enriched attributes into a single long-text field.
A few things worth knowing: not every email will return enrichment data, match rates vary by industry and email type. Enrichment only applies to new submissions after activation, not historical responses. And the form needs at least one Email field for enrichment to trigger.
Lead Enrichment is available now in the Formaloo App Store.

One Question At a Time forms now support a unique cover image per question, not just a single banner for the whole form.
Upload an image directly in the question's settings, and it replaces the form-level banner for that step. If a question doesn't have its own image, the form banner acts as the fallback automatically. Welcome pages and ending pages can have their own cover images too. See how you can add individual cover images per page in one‑question‑at‑a‑time forms.
Four of the six 1QAT layouts support this. If you're on a layout that doesn't, the option is visible but disabled with a clear explanation.
The builder preview updates dynamically as you navigate between questions, what you see is exactly what your respondents will see.
The progress bar was previously only available in 1QAT forms. It's now available in Classic (multi-page) forms too, with the same visual design, same size, color, animation, and position.
In Classic forms, progress advances per page. On a five-page form, each page moves the bar forward by 20%. In 1QAT, it still advances per question.
For 1QAT, the progress bar is now enabled by default when you switch a form to that mode. You can still turn it off manually if you don't want it, and if you do, your preference is respected until the next time you switch modes.
Single-page Classic forms don't show the progress bar. The option is disabled with a prompt to add a page first.
Each field in Formaloo already has a Field ID. That ID is now mapped to the DOM as a stable id attribute, so you can target any specific field directly in Custom CSS or Custom JS, no brittle selectors, no DOM guessing. Learn more about how to use field IDs in Custom CSS & Custom JS.
/* Make a specific field's label bold */
[data-field-id="email"] label {
  font-weight: bold;
}
/* Add a border to a specific field */
[data-field-id="phone_number"] {
  border: 2px solid #0066cc;
  border-radius: 8px;
  padding: 12px;
}
/* Style the welcome page */
[data-field-id="welcome_page"] {
  background: linear-gradient(135deg, #667eea 0%, #764ba2 100%);
  color: white;
}
// Get a field element
const emailField = document.querySelector('[data-field-id="email"]');
if (emailField) {
  emailField.classList.add('highlight');
}
// Focus a field when the form loads
const firstField = document.querySelector('[data-field-id="full_name"]');
if (firstField) {
  const input = firstField.querySelector('input, textarea, select');
  if (input) input.focus();
}
This works on all published forms. If a field is hidden by logic and isn't rendered, the element won't exist in the DOM; handle that with a null check in your JS.
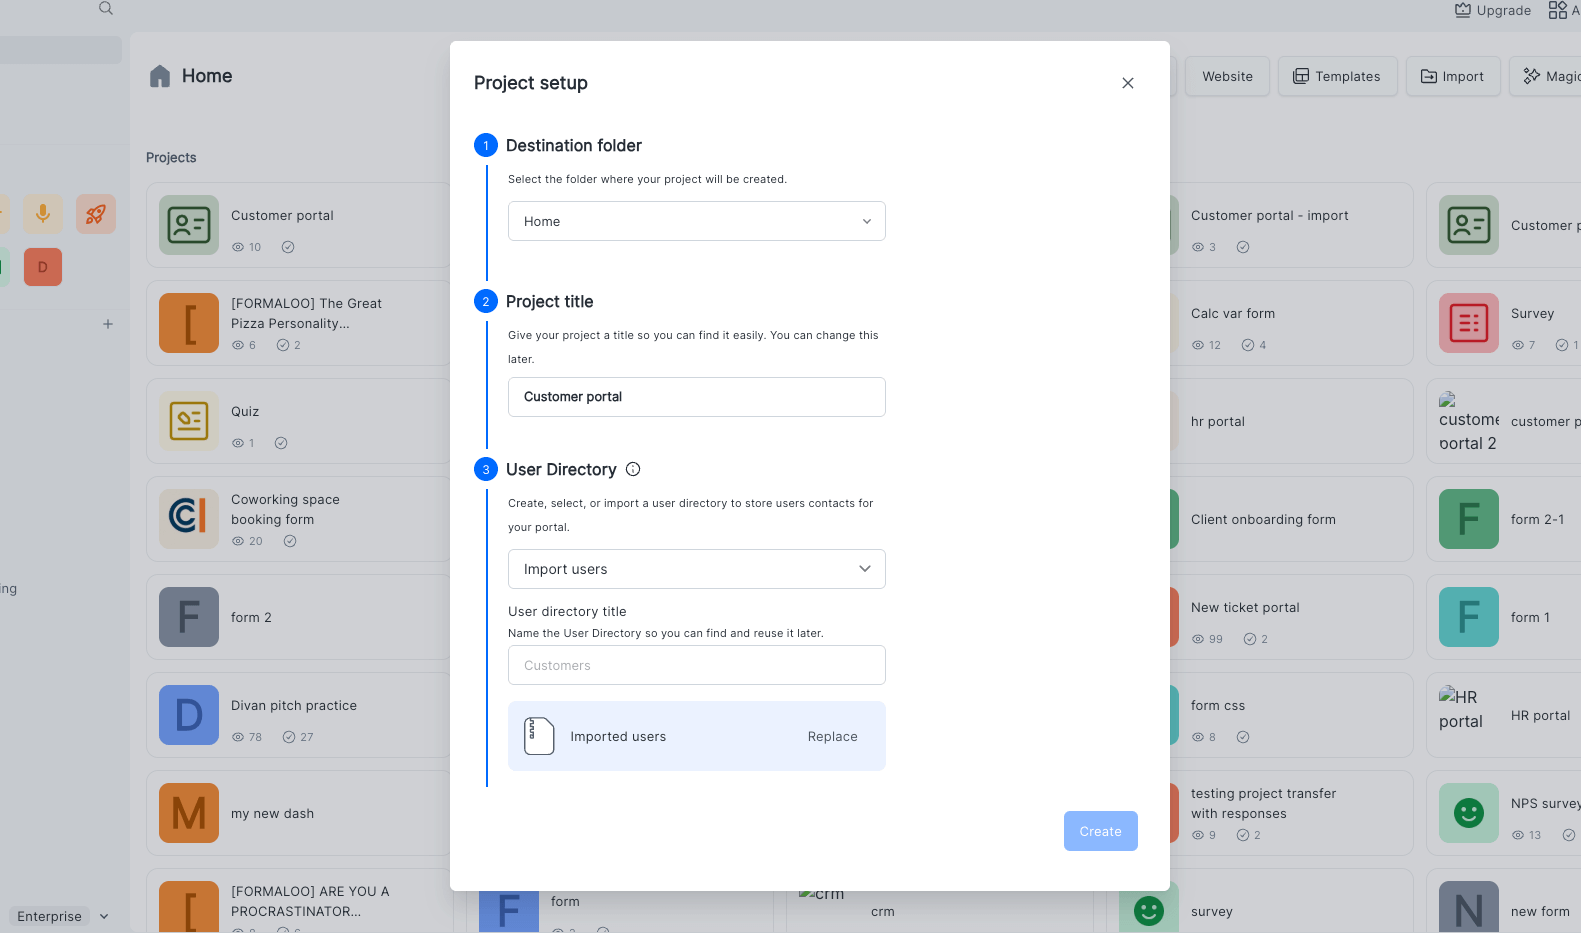
Creating a new project, whether from a template, the + New button, or by duplicating an existing one, now opens a focused configuration pop-up before anything is created.
The fields you see depend on the project format:
Destination and form type are pre-filled based on where you started. For Memory forms and Portals, you can connect an existing user directory or create a new one on the spot, and optionally import users via Excel or a pasted email list, all in the same flow.
We also fixed the sign-up onboarding loop and the inconsistency that appeared when signing up directly from a template.
Data Blocks have been rebuilt under the hood. This update makes data blocks much faster & easier to work with, especially when you have big data.
The Kanban view in portal now correctly shows the uncategorized column, and folder-based row assignments work reliably across all folders.
.png)
This month, we focused on making Formaloo more flexible for teams while refining the details that matter in your daily work. Whether you're managing complex projects, migrating from older setups, or just trying to get forms to look exactly right, we've been listening.

We introduced Teams: a system that lets your workspace mirror how your organization actually works. Think of each workspace as a company: now you can create departments, assign people to them, and use those teams to shape who sees what and who owns what.
Here's how it works:
• Create and manage teams: Workspace admins can create, edit, and delete teams directly from the Workspace Members page. Teams are global to your workspace, so the structure is visible to everyone.
• Flexible membership: Users can belong to zero, one, or multiple teams. Adding or removing someone from a team is a quick multi-select. Teams show up next to each member's name, and you can filter by team to see composition at a glance.
• Teams in the Share tab: When sharing projects or folders, teams now appear alongside individual members. You can also add brand-new workspace members directly from the Share sidebar, no need to go through the Members page first.
• Assign tasks to teams: (Enterprise) The Assignee field now supports teams, not just individuals. Assign a task to a department and every member of that team sees it. (More on this in the task assignment section below.)
• Streamlined access levels: We took this opportunity to clean up the access level system, removing unnecessary layers that added confusion without adding real control. Fewer options, clearer permissions.
If you've been managing a growing team and permission sprawl has been slowing you down, this is the update to pay attention to.
Try it now → Set up your first team in Workspace Members.

You can now assign tasks directly to specific team members within Formaloo. When you create or edit a task, you'll see a new assignee field that lets you delegate work to the right person. No more ambiguous ownership or lost follow-ups, just clear accountability.
This is especially useful for:
👉 Learn more about the assignee field in Formaloo and how to use it
📍 Included in: Add-ons (contact support for pricing)
We've added ready-to-use PDF templates so you can start generating professional documents faster. Browse templates for invoices, reports, certificates, contracts, and more, then customize them to match your brand.
Each template includes:
You can use the PDF templates to print a signed form or contract as a PDF and email a signed form or contract as a PDF attachment. Whether you're automating client invoices or generating weekly reports, you'll find examples that get you 80% there.
Try it now → Browse PDF templates and start customizing.
Your Google Sheets integration now automatically tracks two things it couldn't before: the PDFs you generate and the rows you delete.
Here's what changed depending on your sync type:
Two-way sync adds one new column: PDF links, which contains the URLs of any PDFs auto-generated for each response. If automatic PDF generation is enabled on your form, the links populate as submissions come in. If it's not enabled, the column still appears (but stays empty) so that when you do turn it on later, everything lines up without disrupting your sheet.
One-way sync adds two new columns: PDF links (same as above) and Formaloo ID, a unique identifier per row that Formaloo uses to match and delete rows in your Sheet when the corresponding entry is removed in Formaloo. This is what makes row deletion actually sync.
Important: if you've customized your sheet, this update will affect your column layout. Before it takes effect, do the following:
This keeps your data intact and your custom work in place.
👉 This was already noticed to users who have a Google Sheets connection in their workspaces. Please check your inbox for full instructions.
Try it now → Configure your Google Sheets integration settings.
Forms are often the first thing visitors interact with on your site. If they look out of place, you lose people before they even start. This update gives you the controls to make your forms feel like they belong, anywhere you embed them.
Make it look native
Corner radius consistency: The "Round" corner setting now applies uniformly across both fields and buttons. Before this fix, switching to "Round" would round the buttons but leave fields with a different radius, a subtle but noticeable mismatch. That's gone. Everything rounds together now, across all field types.
Answer box background color & transparency: You can now set a custom background color for input fields, with full transparency control. Want fields that blend into your page? Make them transparent. Want them to match a specific brand color? Set it directly. By default, the behavior stays exactly the same as before, but the control is yours when you need it. One thing to know: if you change your Answer Color, the Answer Box Color resets to its auto-generated default. If you then manually set it again, your custom value sticks, until the next Answer Color change.
Font size options (A1, A2, A3): Three global font size presets. A2 is the current default. A1 scales everything down, A3 scales everything up, and all typography (titles, questions, answers, button text, section headers) scales together proportionally. Particularly useful when embedding forms inside smaller containers or larger hero sections.
Make it shorter
Multi-field rows: You can now place up to 3 fields per row. Each field gets a width option, 33%, 50%, 66%, or 100%, and fields arrange themselves into rows automatically based on available space. Put first name and last name side by side. Stack three short fields across. Shorten your forms without removing anything. A few things to know: this applies to Classic Forms only, certain structural fields (Matrix, Table, Repeating Section, and a few others) stay full-width, and on mobile everything defaults to one field per row , responsive behavior there is unchanged.
Inline choices: Single choice and multi choice fields now support a Wrap layout option. Instead of stacking one option per line, options appear inline and wrap based on form width. Shorter forms, less scrolling, same clarity.
Make it fit
Padding & form width controls: New controls let you set vertical spacing between fields and a custom total form width. These are the two settings that make the difference between a form that looks awkward inside a sidebar and one that fits like it was designed for the page. Form width doesn't apply on mobile, responsive behavior there stays unchanged.
If you've been holding onto forms in the legacy dashboard, you can now migrate them to the new experience with one click. Migrated forms will appear in both the old and new dashboards during your transition. Also your forms UI will not change, so there's no disruption to existing workflows. When you start editing the form in the new dashboard, it will ask you to migrate it to the new forms UI version.
What gets migrated:
What to know:
See how to migrate forms → View forms eligible for migration and start your transition.
As always, we'd love to hear what you're building and what would make Formaloo more useful for your workflow. Drop us a note at support@formaloo.com or share feedback directly in the app.


