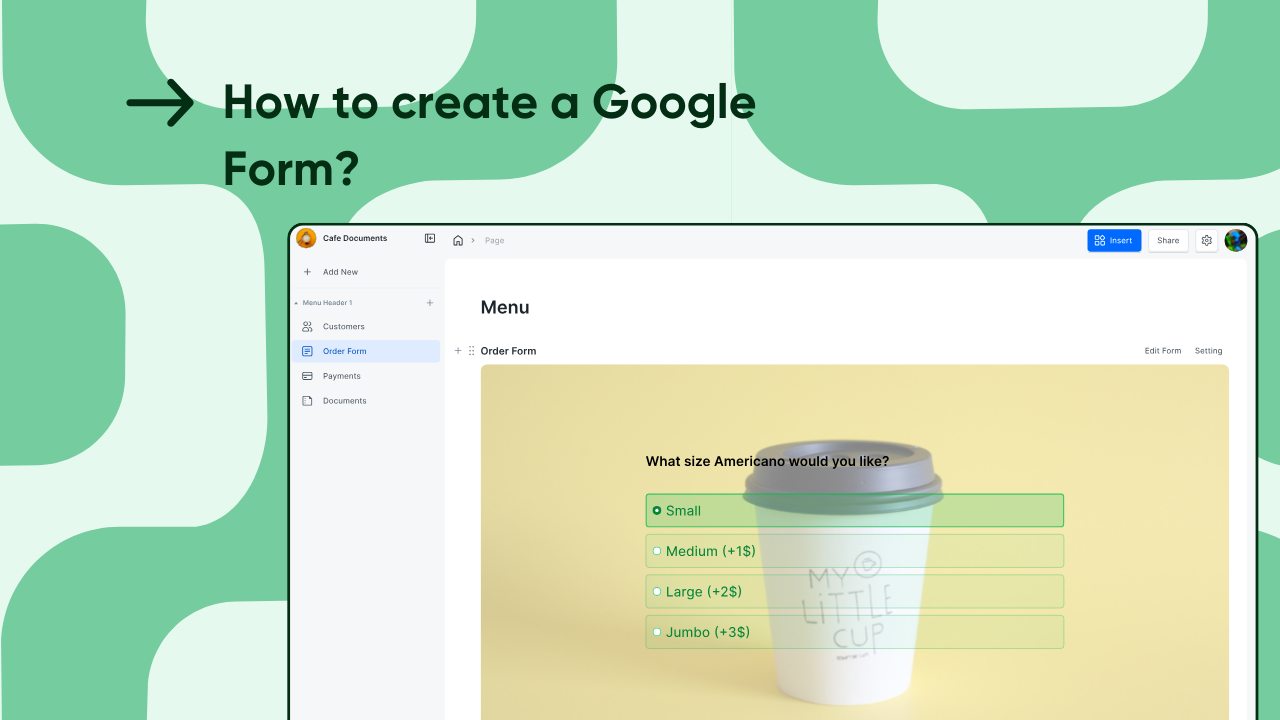
How to create a Google form? A comprehensive guide
Google Forms pops up in the mind whenever someone mentions forms or surveys. Read the blog and learn how to create a Google form from scratch.

Google Forms is a popular free online tool for creating questionnaires, polls, and surveys. Besides its corporate utility, It also has many use cases in education for both teachers and students.
The tool lets you add various question types, customize your form’s look, use built-in logic and sections to guide respondents through different paths, and track responses in real time.
Plus, it also easily integrates with Google Sheets, so you can collect and analyze data all in one place.
In this guide, I'll walk you through the exact steps on how to create a Google Form from scratch to its distribution among your respondents.
Let’s get started.
How to create a Google form? Step-by-step guide
Follow these simple steps on how to create a Google Form to ensure your next survey or feedback form is set up correctly and looks super professional.
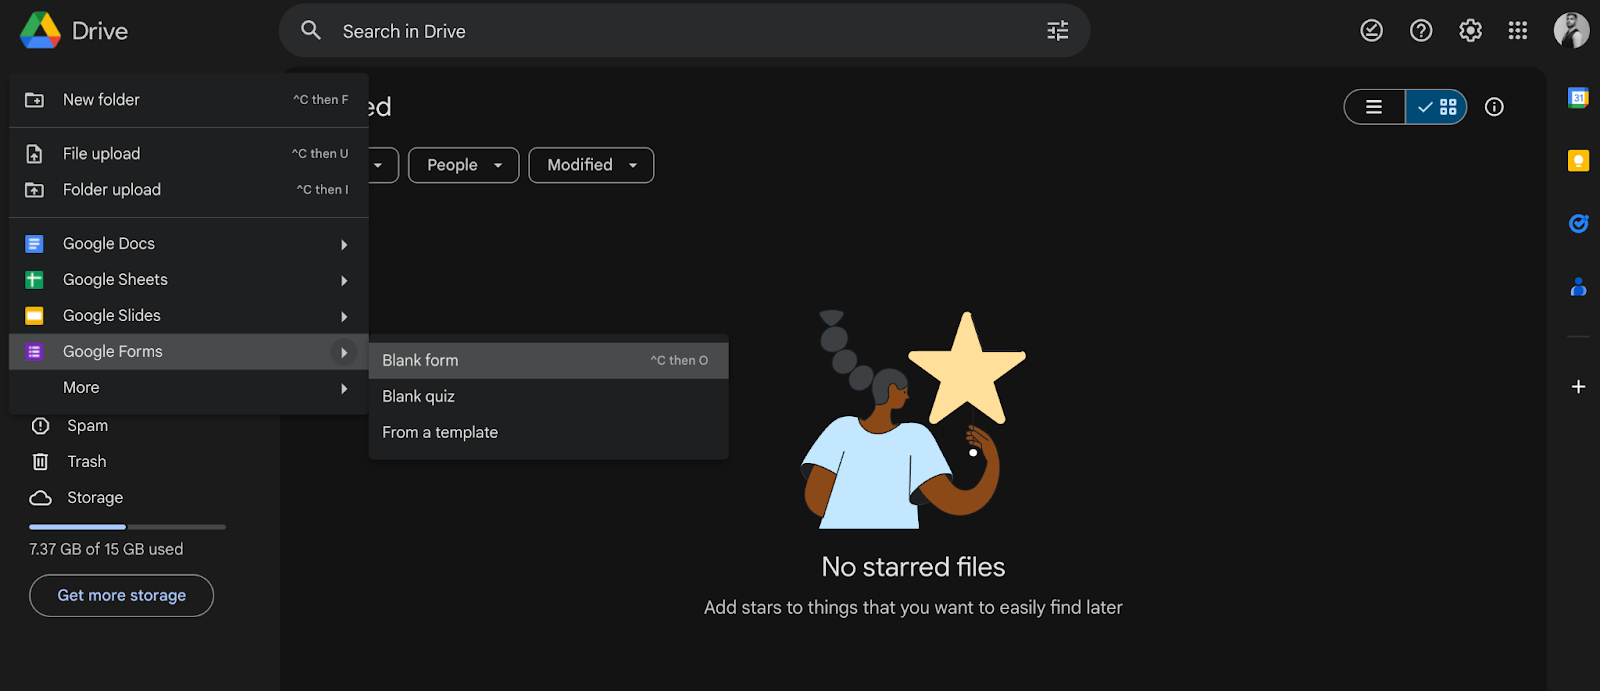
1. Access Google Forms
The first step in creating Google forms for polling, feedback, surveying, and other purposes is to get to the Google Forms home page. You can either:
- Type forms.google.com into your browser, and it will take you directly to the main page of Google Forms.
- If you're already in Google Drive, click on the “New” button on the left. From the drop-down, hover over “Google Forms” and select either a blank form or a template.
2. Choose a template or start from scratch
You’ll need to decide how to create a Google Form, either with a template or start with a blank form.
There are various pre-made Google Forms templates that you can use. These include forms for feedback, event registration, quizzes, RSVP, and more. If one of these fits what you need, click on it, and it will open for you to edit.
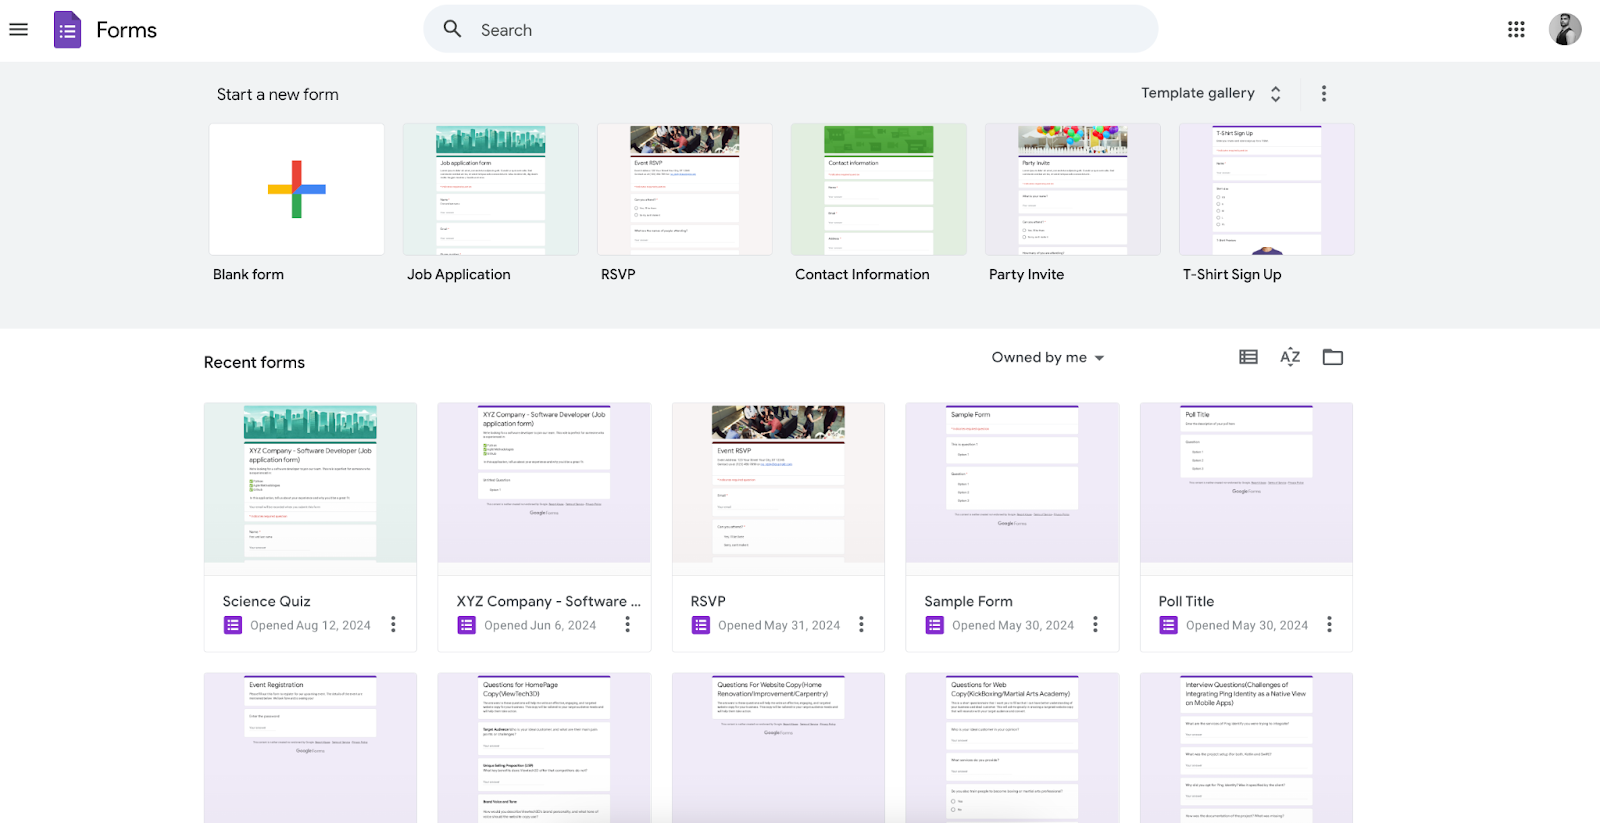
If you have a unique form in mind or want complete control over every detail, you can start with a blank form. To do that, simply click on the "+” button with “Blank form” description.
3. Add a title and description
At the top of the form, click where it says "Untitled form." This is where you enter the name of your form. Make it clear and relevant to what the form is about.
Right below the title, you’ll see space for a description. Adding a description is optional, but it’s a good place to briefly explain what the form is for or provide any instructions people may need before filling it out.
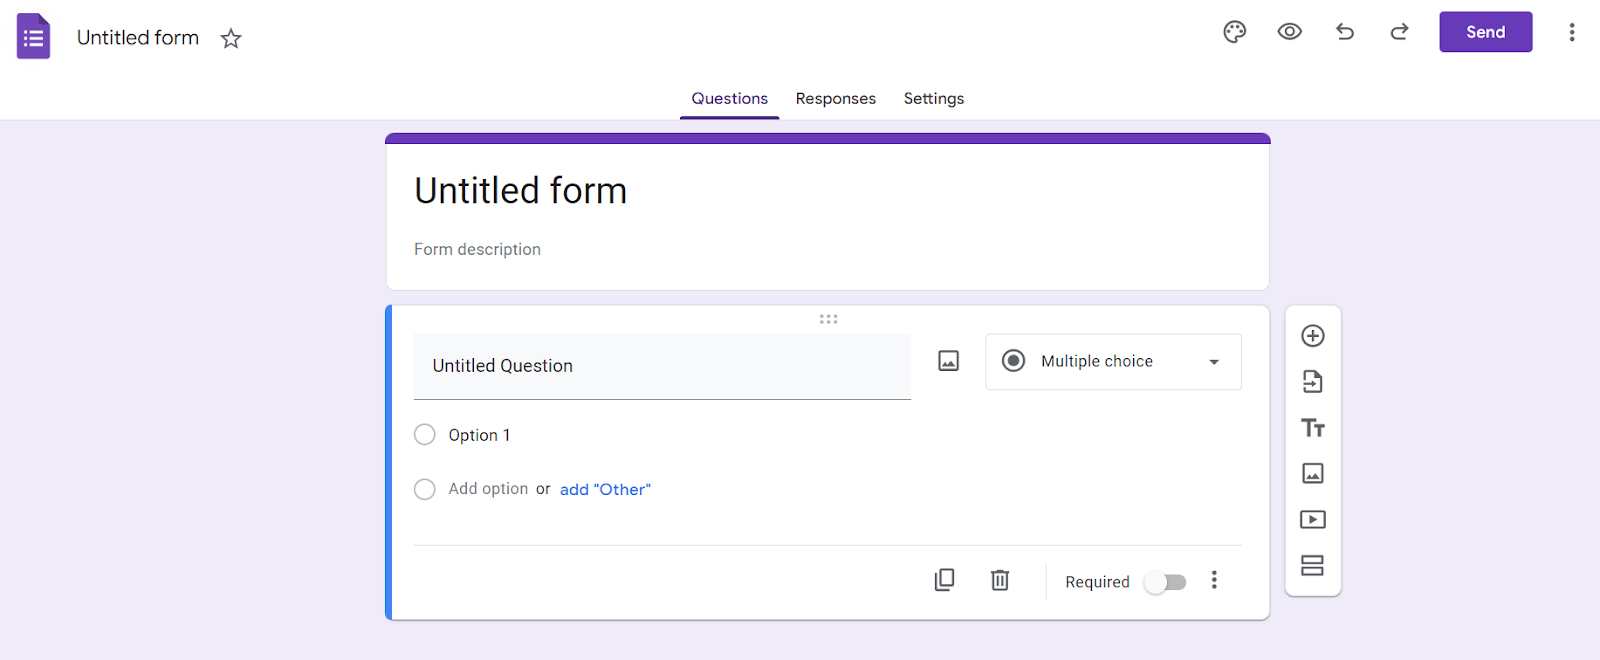
4. Insert and customize questions
Now that you’ve added a title and description, you need to insert relevant questions if you’re making a questionnaire.
If you start a new form, you see the first question field already present. Click where you see “Untitled Question” to write your first question.
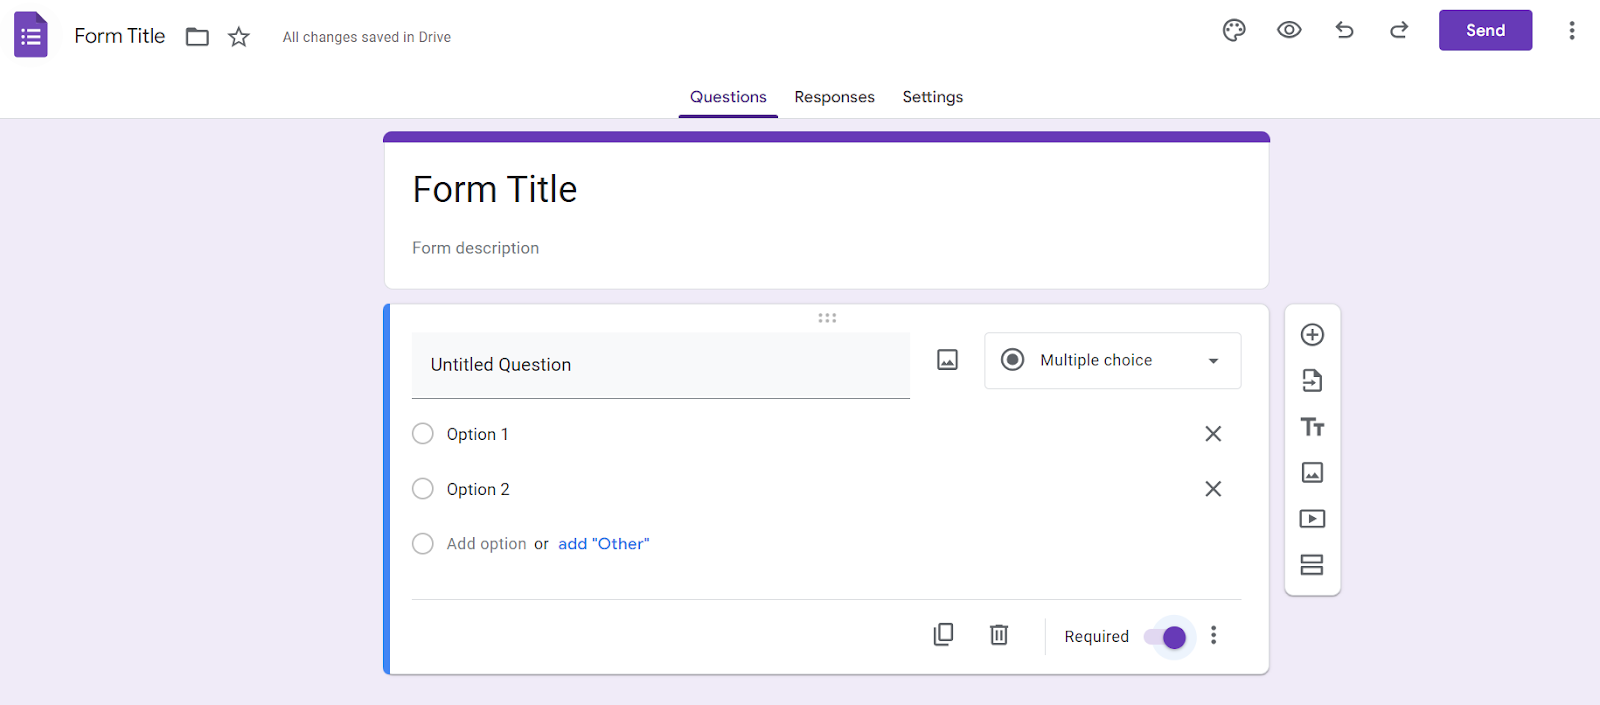
Google Forms lets you pick from different types of questions like multiple choice, short answer, checkboxes, or dropdowns. You can choose the type from the drop-down menu next to the question.
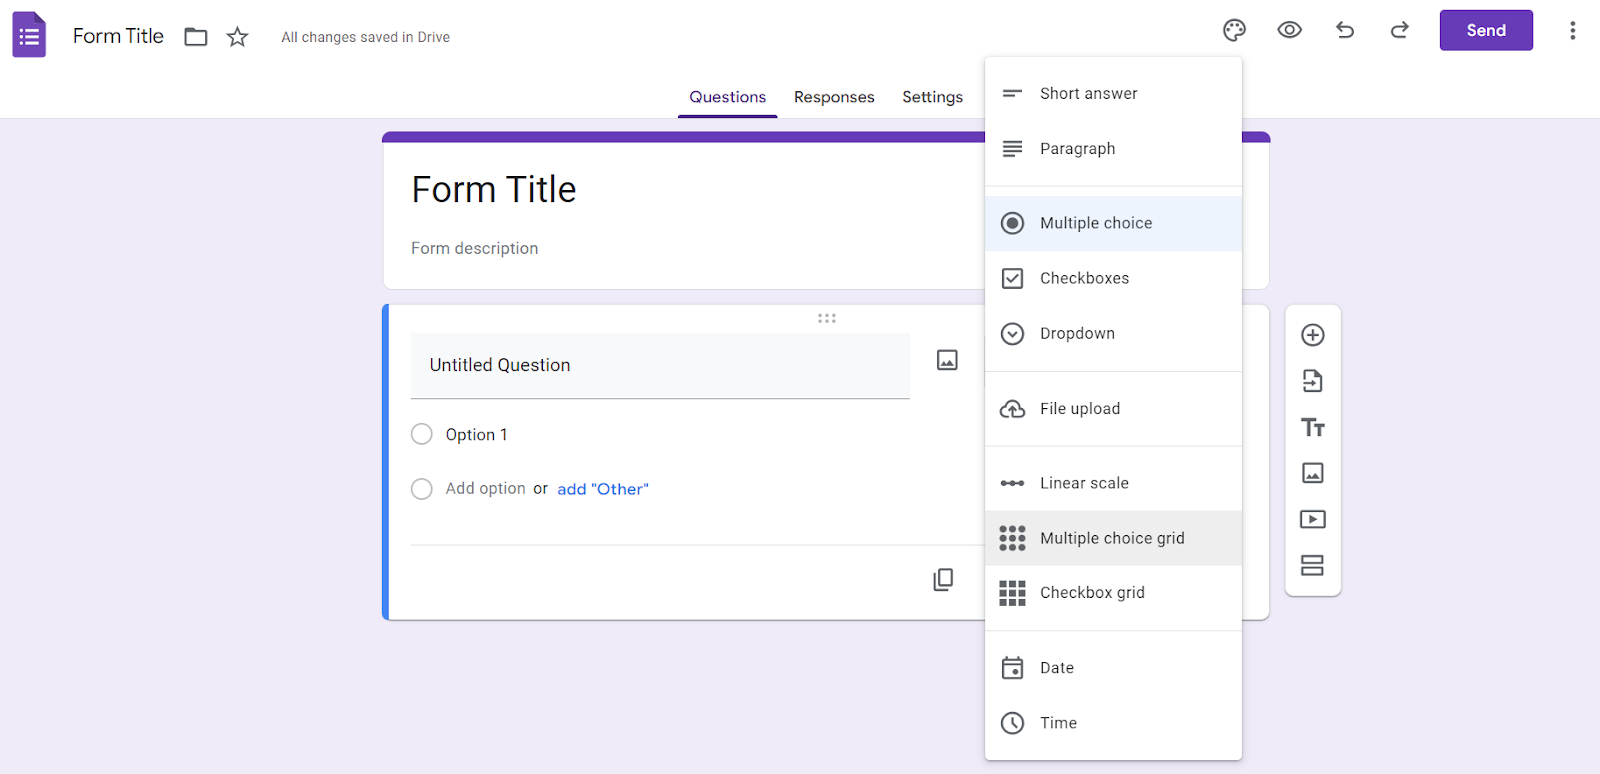
For multiple choice and checkbox questions, you'll also need to add answer choices. Click the "Add option" button to add more choices.
If you want respondents to mandatorily answer a particular question, you can make it required. Just check the "Required" box next to the question.
You can also add pictures and videos to your questions on Google Forms. To do this, just click on the picture or video icon in the question toolbar and you’ll see a dialogue box appear from where you can select your desired media.
You can continue adding more questions by clicking on the “+” icon from the sidebar.
5. Preview and test the form
Once you've added all your questions, check how your form looks and works. Click on the eye icon at the top right of the screen to preview your form. Make sure everything looks the way you want, including the layout and question order.

In the preview mode, go ahead and answer the questions just like a respondent would. It helps you make sure the form works correctly, the required fields are in place, and all your settings are functioning as expected.
Give final touches to your form
We just showed you how to create a Google Form with basic functionalities. Now let's explore advanced features like conditional formatting and custom branding.
Here are some additional Google Forms tips that make for forms stand out:
Configure form settings
You can fine-tune your form with important settings to control how it works. Here are some useful settings:
- Restrict to Specific Users: You can limit who can fill out your form. Go to Settings and under the "Responses" section, you can restrict the form to certain people by requiring them to sign in with a Google account or belong to a specific organization.
- Collect Email Addresses: If you need to gather email addresses, turn on the “Collect email addresses” option to add a mandatory email field at the beginning of the form.
- Send Respondents a Copy of Their Responses: You can choose to automatically send respondents a copy of their answers. Simply toggle the option in the settings under the "Responses" section.
- Allow Response Editing: If you want people to be able to change their answers after they’ve submitted, you can allow them to edit their responses by checking the "Allow response editing" option.

Customize the look of your form
Once you’ve learned how to create a Google Form and your questions are in place, you can customize its appearance and make it appealing.
Click the Palette icon at the top right of your screen. You can choose a color theme that matches your style, purpose, or brand. Google Forms also offers preset themes with different color schemes.

Besides changing the color theme, you can play around with different text fonts and sizes for different parts of your questionnaire on Google Forms.

If you want to add a company logo or relevant image at the top, you can do so by uploading a header image. Click “Choose image” inside the theme settings under Header, and you can upload your own image or select one from the available options.
Implement conditional formatting
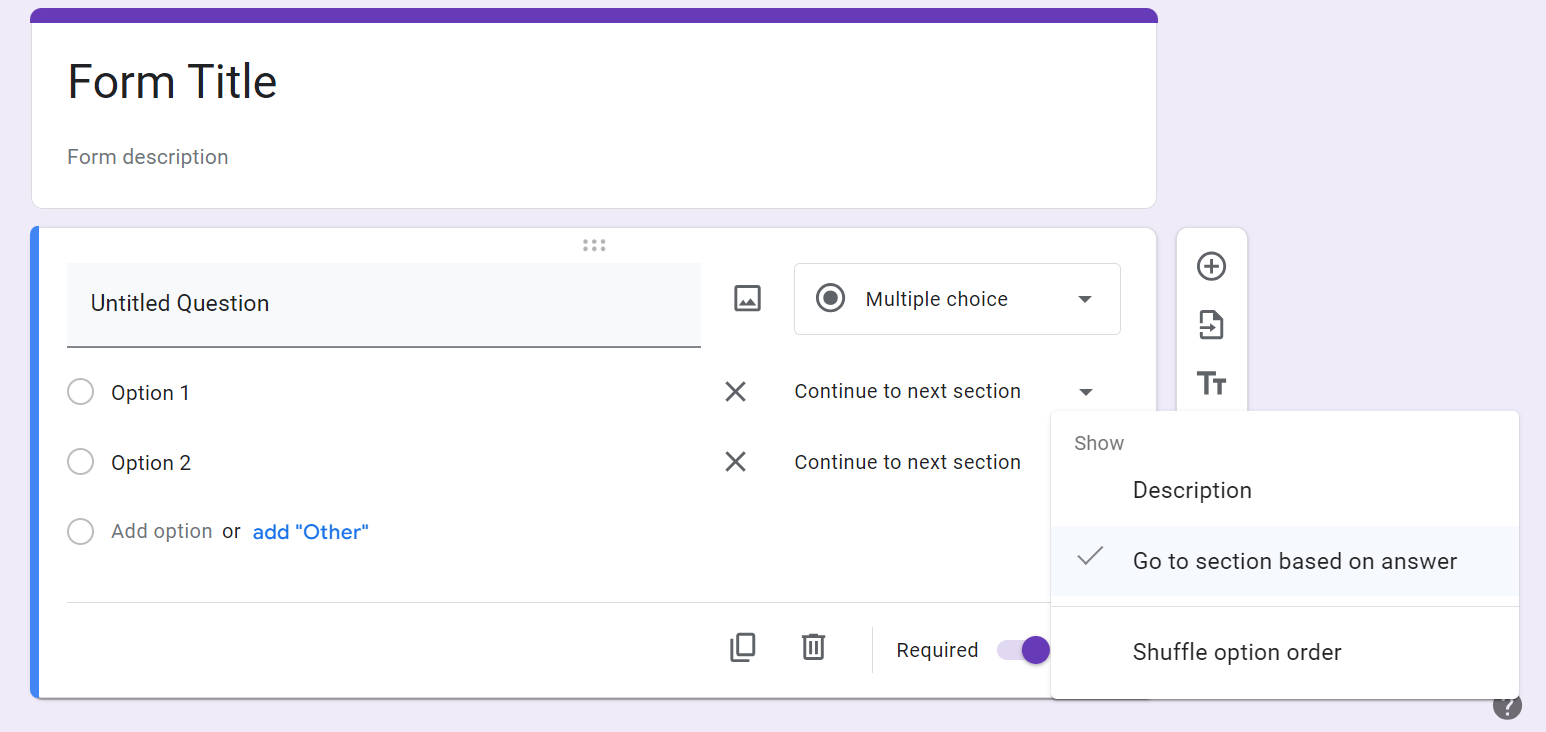
Conditional formatting allows your respondents to follow different paths in your form based on their answers.
For instance, if you’re a teacher, you can create a dynamic quiz for students that have different subsequent questions for students with different answers to a branching question. This is done using sections and logic branching.
To divide your form into sections, particularly when it is too long, click the “Add Section” button (two stacked rectangles icon) on the toolbar. It divides your questions into different small parts appearing one after another instead of scaring away the respondent with a long list of questions on a single page.
After adding sections, you can use logic branching to direct people to different sections based on their answers. For example, if someone selects 18+ as their age, you can send them to the section made for adults.
To apply logic branching, click on the question that you want to branch from. Then select the three-dot menu next to the question and choose "Go to section based on answer." From there, choose which section the form should go to for each answer.
Distribute your form for submissions
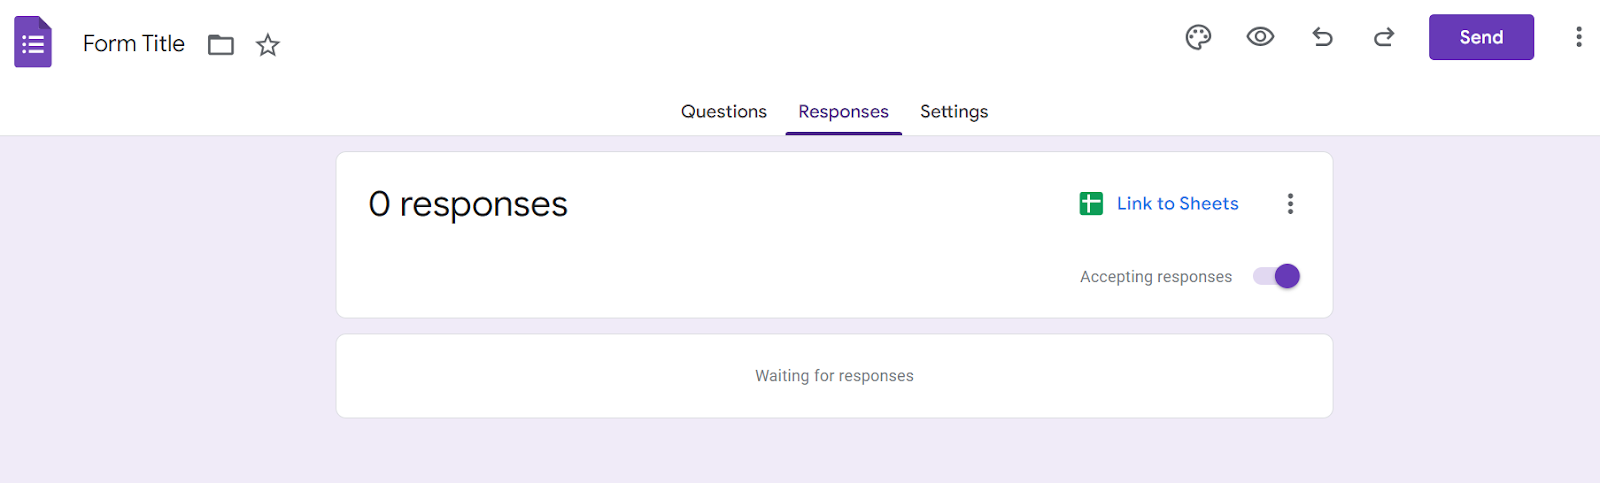
Before you share your form, make sure you have connected it to Google Sheets to collect and organize the responses in one place.
Simply go to the Responses tab and click the green Sheets icon to create a linked spreadsheet that updates with each submission.
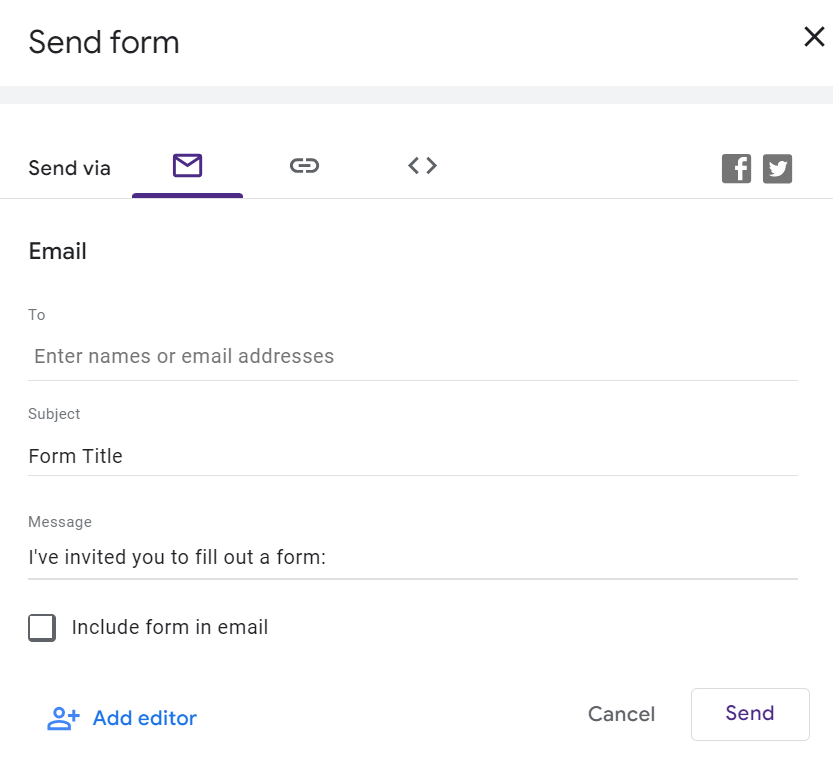
Now, there are four ways to get your form out there:
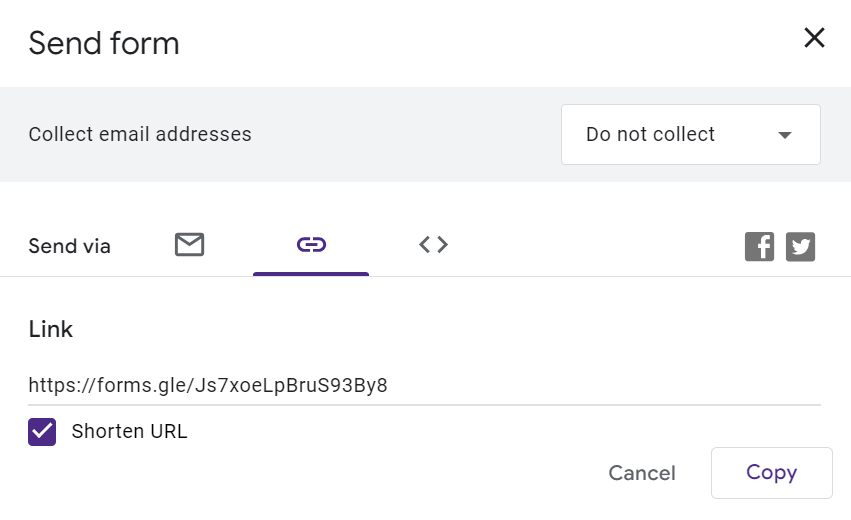
- Share link: To share your form, click on the "Send" button. Copy the Google form URL and send it to the people you want to fill out your form.
- Embed in a website: If you are promoting the form on your website, you can embed the form directly into it so people can fill it out without leaving your site.
- Share via Email: You can also send the form link directly to people via email.
- Share via QR code: While not possible within the tool, you can use a third-party add-on to create a Google Form QR code and distribute your form without the risk of broken link.
For convenience and a cleaner look, consider shortening the link. Shortened links are easier to manage and less prone to breaking when shared across different platforms.
Formaloo: A better alternative to Google Forms!
While you’ve learned how to create a Google Form, it's worth noting that Google Forms is pretty limited in terms of customization and response tracking.
A better alternative to Google Forms is Formaloo due to its extensive feature-rich library. Here's what Formaloo offers that Google Forms doesn't:
- Formaloo has over 200 templates to choose from, while Google Forms only has a handful.
- Formaloo offers over 30 question types to collect a wide range of data.
- It provides real-time tracking and analytics.
- You can integrate Formaloo with Slack and Google Sheets.
- While being an intuitive survey maker, Formaloo is also a database app builder. You can create your own apps to collect and analyze data from online forms without needing to code.
So, if you're looking for a form builder that can do everything Google Forms can and more, give Formaloo a try.
FAQs
Can you make Google Form in mobile?
Yes, you can create and edit Google Forms on mobile devices using the Google Forms app or through a mobile browser.
Are Google Forms safe?
Yes, Google Forms uses strong security measures such as encryption, automatic spam protection, and secure data storage that protect your data.
However, it's always a good idea to review the privacy settings of your form to ensure your data is handled as you intend.
What is better than Google Forms?
Formaloo is a better alternative to Google Forms for more detailed and personalized form management. It offers advanced features like custom branding, in-depth analytics, and more complex workflows that Google Forms doesn’t.

%20(1)%20(1).jpg)