How to create a database in Excel? A complete step-by-step guide
It’s very easy to create a database in Excel. In this blog, let’s how to create a database in Excel by following 5 simple steps.
Microsoft Excel has been a business essential for almost two decades. One of its signature features is creating a database where you can store and quickly locate your data.
There’s a lot you can do with Excel databases, like store, manage, calculate, and analyze your data with minimal effort.
And if you're willing to put the time and effort into it, there are formulas and functions that get a lot more done.
In this article, I’ll explain you how to create a database in Excel and take it a step further by importing it into Formaloo for advanced analytics.
How to create a database in Excel: Step-by-step guide
Excel is not exactly a DBMS software, but because of its accessibility, it does turn out as an ad hoc database.
Now, without further ado, let’s walk you through the entire process of how to create a database in Excel.
1. Set up your spreadsheet
Open Microsoft Excel and start a new spreadsheet by going to “File” and selecting “New.”
In the first cell of the first row of your spreadsheet, type the name of your database. We’ll name our example spreadsheet “Customer Database”
Jump to the next row to define the column headers for the database. Use the tab key to move through the row.
You may use the following column headers if you plan to use customer data for creating a database in Excel:
- First name
- Last name
- Phone number
- Last purchase date
- Last purchase amount
- Customer lifetime value
- Customer satisfaction score
- Net promoter score
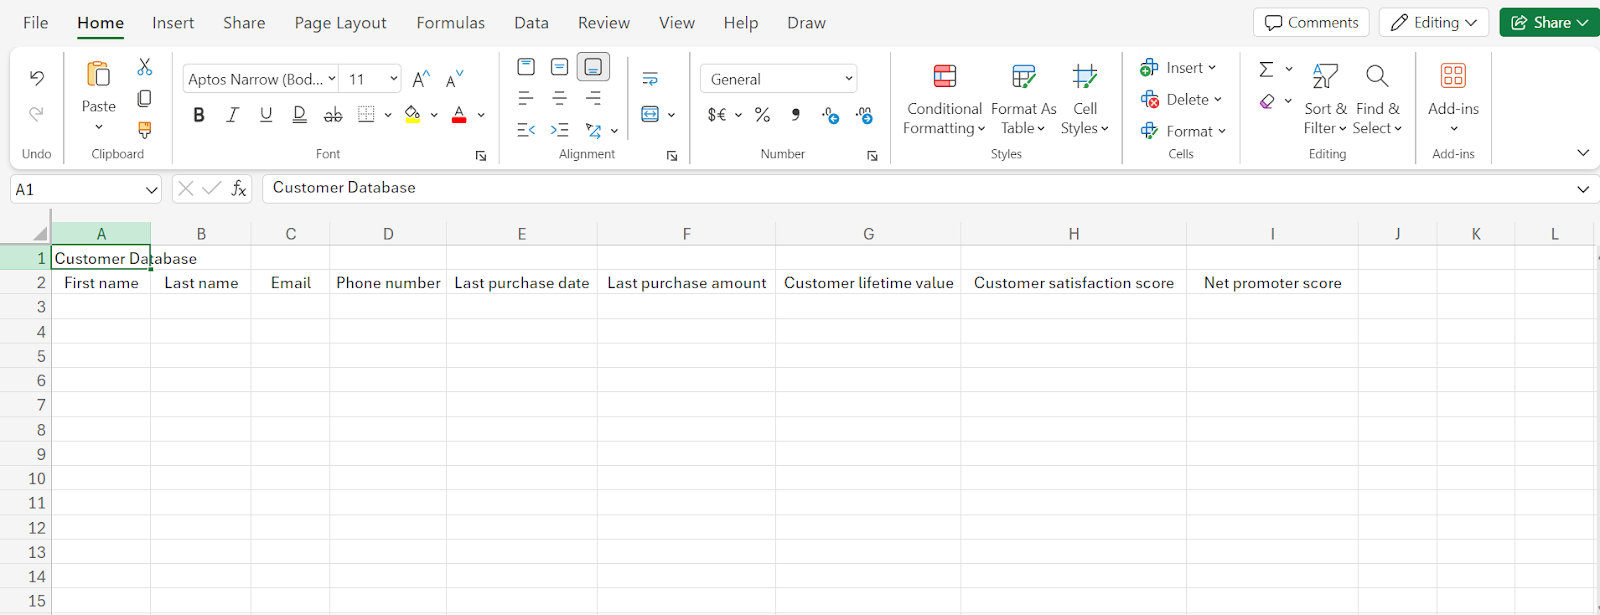
Return to your database title in the first row and select the first row all the way until the last column header. Then, in the Home tab of the menu toolbar, choose the “Merge & Center” option.

2. Implement data validation
Data validation in Excel controls and restricts the type of input into certain cells. It prompts the users to enter the correct data and displays an error message when invalid information is entered.
The purpose of data validation is to ensure your data is accurate and follows the intended format.
To implement data validation, select the range of cells where you want to apply validation. For example, let’s apply it to the “Customer Satisfaction Score” column. You will want to limit this field to a numerical range from 1 to 100.
Go to the “Data” tab in the toolbar and click on “Data Validation.” A new window will pop up.
Under the “Settings” tab in the “Data Validation” window, you can define what type of data is allowed. In the case of Customer Satisfaction Score, choose “Whole Number” and set the minimum to 1 and the maximum to 100.

You can add a message that will appear when an invalid input is entered. Go to the “Error Alert” tab and type your message, for instance, “Invalid entry. Please enter a number between 1 and 100,” and click on “Apply.”

3. Populate the database
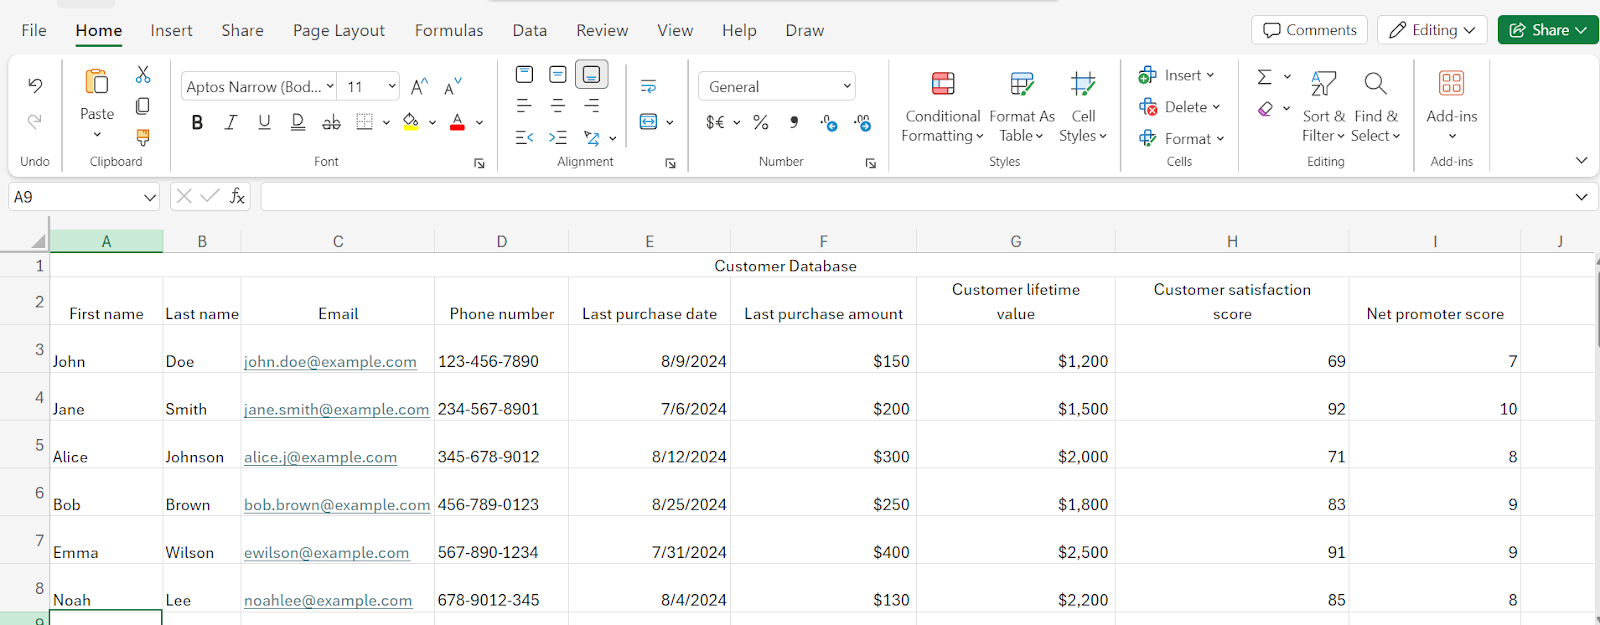
Now that your data validation rules are in place, fill in the relevant data from your form responses in Excel db columns.
Keep data entry consistent. For instance, for entries of phone numbers, enter them all in the same format. You can use entry formatting options like:
- Adding parentheses for area codes
- Including dashes between digits
4. Convert your data range into a table
Converting your data into a table in Excel brings many advantages. It allows for easier data management, sorting, filtering, and formatting options.
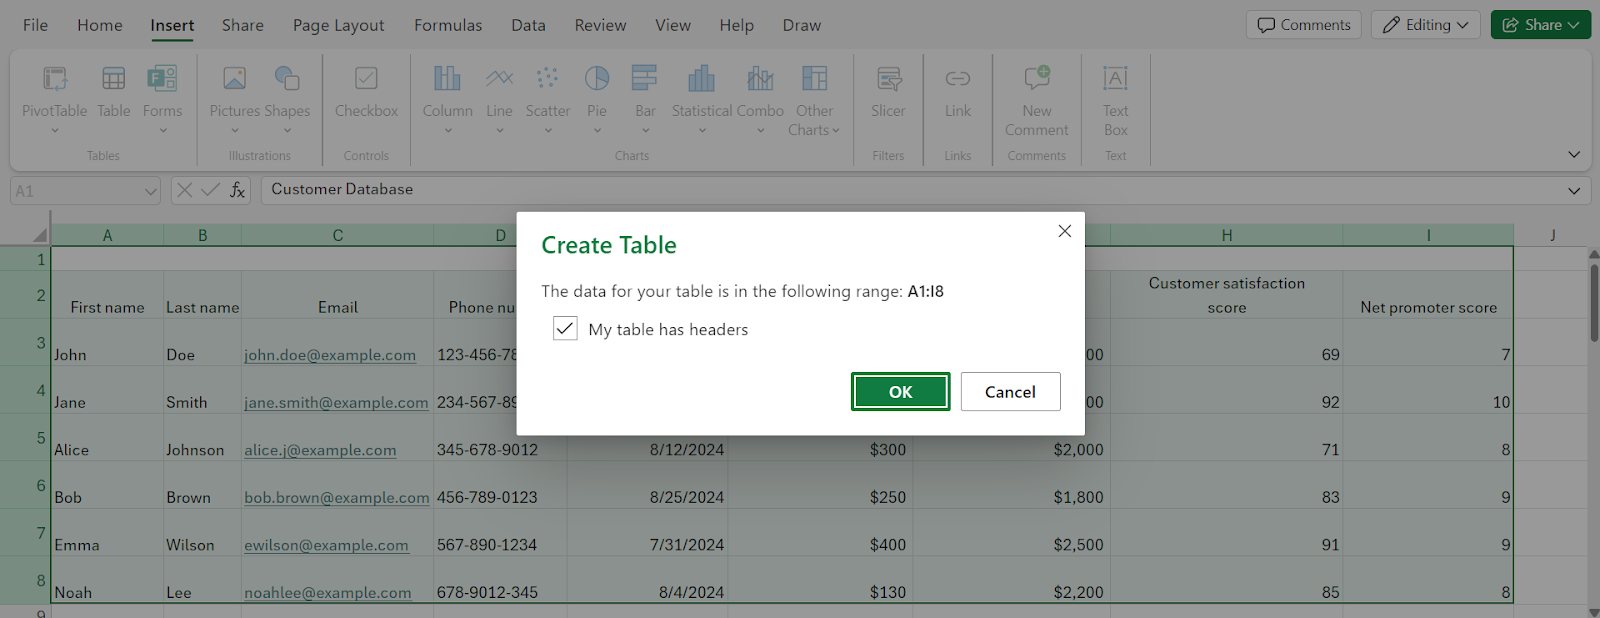
Select the entire range of your data, including the headers. Click and drag from the first header (i.e., First Name) to the bottom right where your last column and row of data end.
Find the “Insert” tab in the Excel toolbar and click on the “Table” button. A pop-up window will appear asking you to confirm the data range. Ensure the checkbox next to “My table has headers” is selected since your data already has defined column titles.
Excel will automatically format your table with a default style, like the one below.
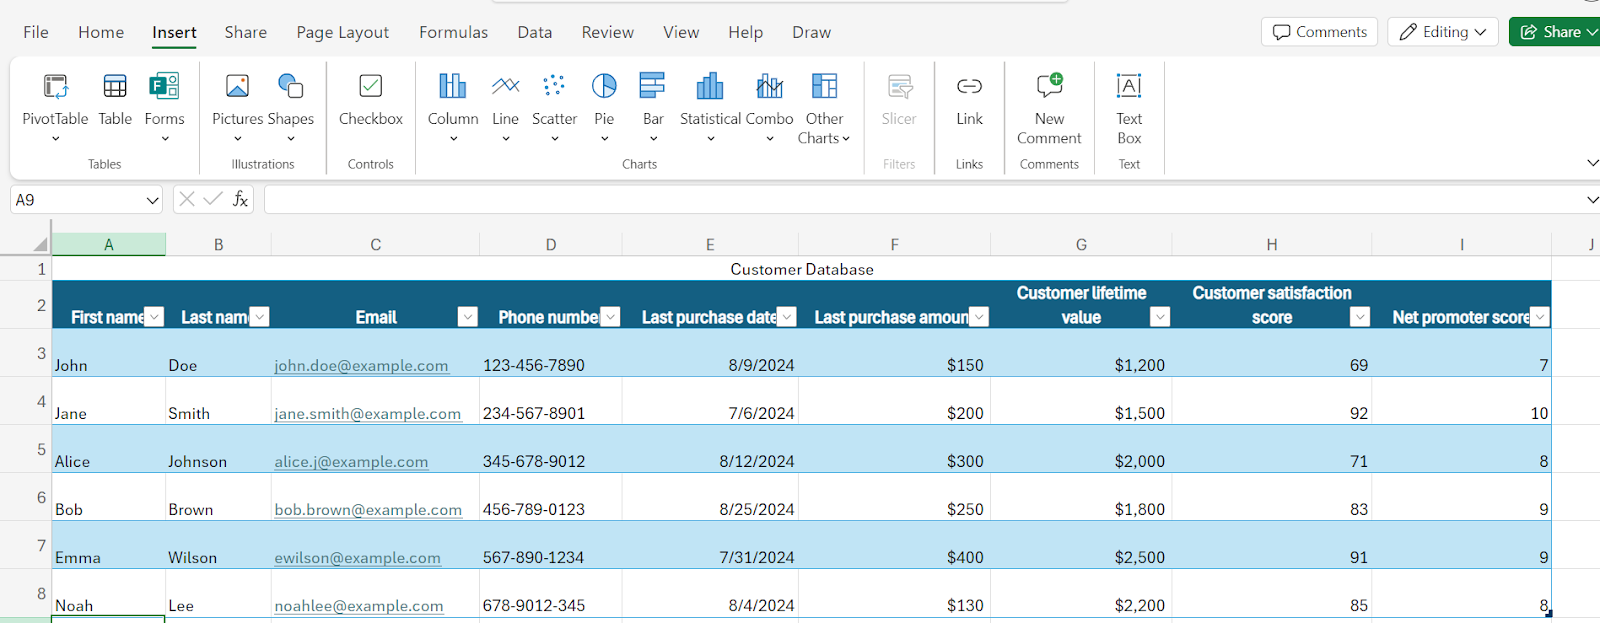
If you'd like to customize the table appearance, use the Table Design tab that appears once the table is created. Here, you can add or remove banded rows and apply custom formatting to your table.

With that, you have successfully learned how to create a database in Excel. We have one more step in store to refine your database.
5. Create unique IDs from your Excel data
In any business, customers may share similar names or even have almost the same email addresses. A unique ID assigns a distinct identifier to each customer, which prevents any potential duplication or mix-ups.
One way to generate unique IDs is by using Excel’s “RANDBETWEEN” function, combined with customer-specific information like their last name.
To implement this method, insert a new column at the beginning of your table and label it “Customer ID”.
In the first cell of the “Customer ID” column, use the “RANDBETWEEN” function to generate a random number. The function will generate a random number within the range you specify. For example, for a 5-digit number, we’ll use the following formula:
=RANDBETWEEN(10000,99999)
To make the ID more specific, you can concatenate the random number with the customer’s personal details, such as their last name. In our case, the last name is now in column C, so we’ll use the following formula in the Customer ID column:
=C3 & RANDBETWEEN(10000,99999)
The formula will take the last name in column C (e.g., "Doe") and concatenate it with the random number (e.g., 37251) to create a unique ID like “Doe37251.”

Import your excel database to Formaloo
Once you know how to create a database in Excel, you can integrate your data with Formaloo.
Excel databases are great for organizing data, however, importing data on Formaloo allows for far better data management and analysis.
On Formaloo, you can structure your data into custom dashboards and create auto-running workflows that drive immediate action based on data.
Plus, Formaloo’s extensive data analysis capabilities extract valuable insights from your database that can help you scale your business much faster.
1. Clean your Excel file
Ensure your Excel file is in either .xlsx or .xls format with no more than 10,000 cells.
To import data from Excel smoothly, the field names and types in the first row must be formatted correctly.
For example, "Full Name (text)" will map to a short text field in Formaloo. If a specific field type isn't available, you can select the closest option or vote for new field types in Formaloo's product roadmap.
2. Validate responses
Ensure your data complies with Formaloo's validation rules. Single-choice and multi-choice fields should include all possible options, and dates must follow the YYYY-MM-DD format. Unsupported formats will be ignored during the import process.
3. Import your Excel file into Formaloo
Once your Excel file is prepared with validated responses, follow these simple steps to import it into Formaloo:
- Log in to your Formaloo dashboard.
- Click on the "Import" button at the top.
- Upload your desired Excel file.
- Click "Send."
Once the import is complete, you'll be redirected to the form’s page.
Auto update databases with Formaloo forms
If you handle multiple datasets, understanding how to create a database in Excel is a must for staying organized. Still, if you need to automatically gather data and hold a database that updates in real-time, an Excel database based on Google Forms isn't robust enough.
Formaloo offers all the capabilities of Google Forms, such as creating customizable survey forms and collecting responses. But it doesn’t stop there.
It also lets you link your forms directly to your databases. As responses come in, the data is automatically updated without any manual intervention to save you time and reduce the risk of human error.
Start building smart forms with Formaloo today and get database updates like never before!
FAQs
Can Excel be used as a database?
Yes, Excel can certainly be used as a simple database for storing, organizing, and analyzing data. However, it is only great for smaller datasets. For larger or more complex databases, Excel lacks many of the rich features that make an advanced open source DBMS software.
What are the uses of an Excel database?
An Excel database can be used for multiple purposes that require organizing data. A few Excel database examples include:
- Tracking inventory
- Keeping track of contacts
- Performing financial calculations


